Difference between revisions of "VPN Ubuntu"
| Line 74: | Line 74: | ||
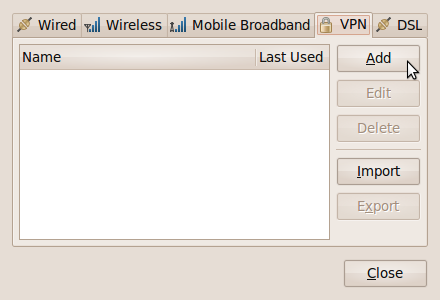
| − | [[File:Vpn-09.png|center|The Network Connections dialog box, with the VPN tab "on top."] | + | [[File:Vpn-09.png|center|The Network Connections dialog box, with the VPN tab "on top."]] |
| Line 80: | Line 80: | ||
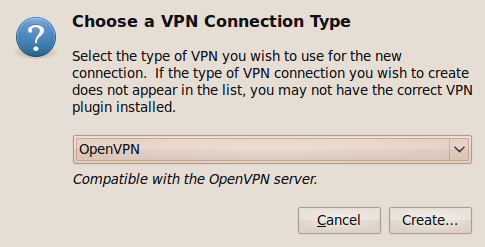
| − | [[File:Vpn-10.png|center|Choosing a VPN connection type] | + | [[File:Vpn-10.png|center|Choosing a VPN connection type]] |
We'll be working with the following dialog box in the next few screenshots. When first presented it looks like this: | We'll be working with the following dialog box in the next few screenshots. When first presented it looks like this: | ||
Revision as of 00:50, 25 October 2009
Setting Up OpenVPN for Amahi Server Under Ubuntu 9.10
Not everyone feels comfortable working from the Linux CLI (Command Line Interface), and so the alternate set-up instructions for connecting to Amahi's OpenVPN service might seem a bit intimidating to some. Here is a step-by-step tutorial explaining how to get VPN (Virtual Private Networking) running under a GUI (Graphical User Interface) in Ubuntu 9.10, a distribution of Linux.
Step #1: Install the OpenVPN Application
Although you don't have to understand much about OpenVPN, the FOSS (Free Open Source Software) program Amahi uses for secure connections from outside your Amahi HDA (Home Digital Assistant, the Amahi server you've set up), you do have to have the OpenVPN software installed on your Linux machine. In the case of Ubuntu 9.10 (and 9.04), this isn't installed by default, but, like most Linux distros (short for distributions, the “flavor” of Linux you've chosen), this is relatively straightforward and easy.
Pull down the Applications menu and choose Ubuntu Software Center. (This used to be called “Add/Remove” in previous versions of Ubuntu.)
The Software Center dialog box appears, with the cursor blinking in the text input box.
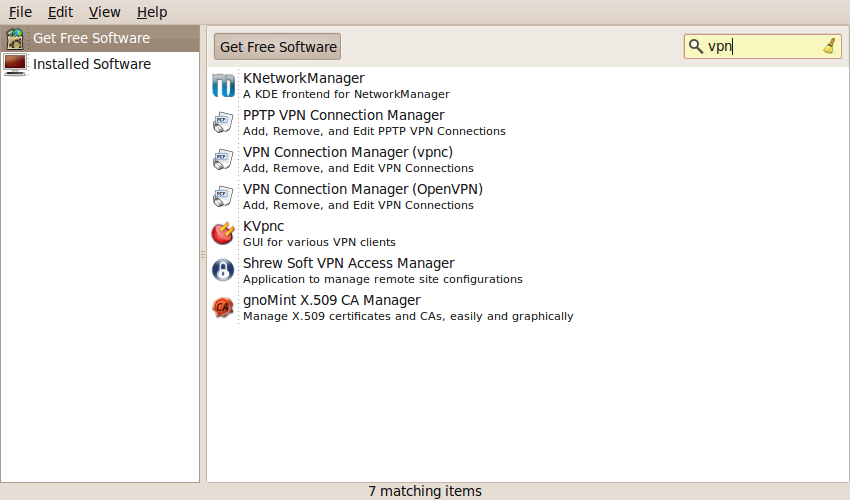
Type in the letters “VPN” (without the quotes, case doesn't matter). That quickly narrows down the options to programs related to VPN. Your sifted options will look something like this:
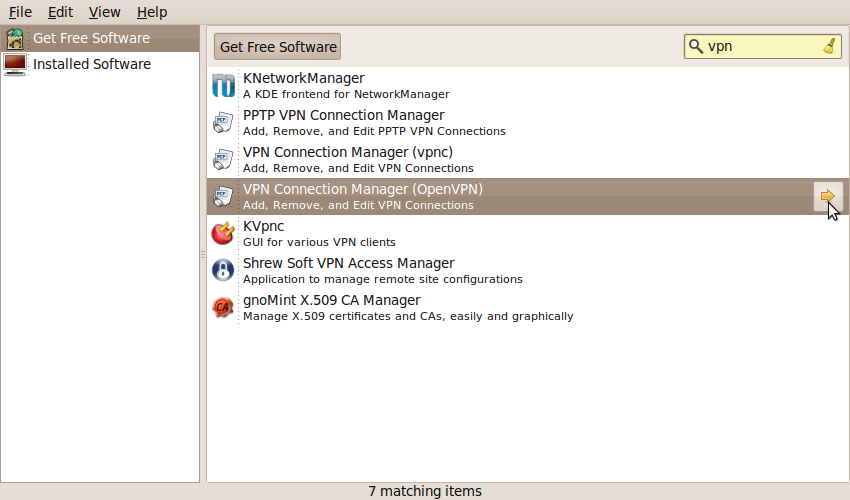
The program we're after is “VPN Connection Manager (OpenVPN).” Highlight that by clicking on it, and note the arrow on the right-hand side of the highlighted line.
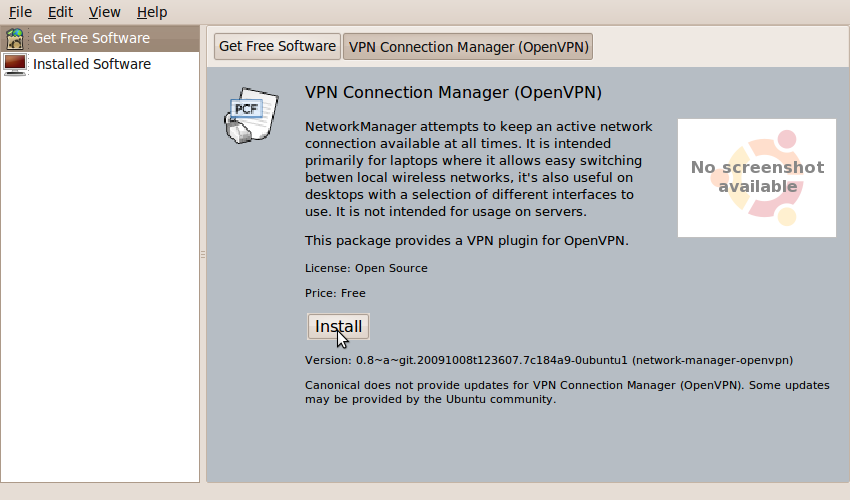
Click on the arrow. What appears is a brief description of the program and the option to install it:
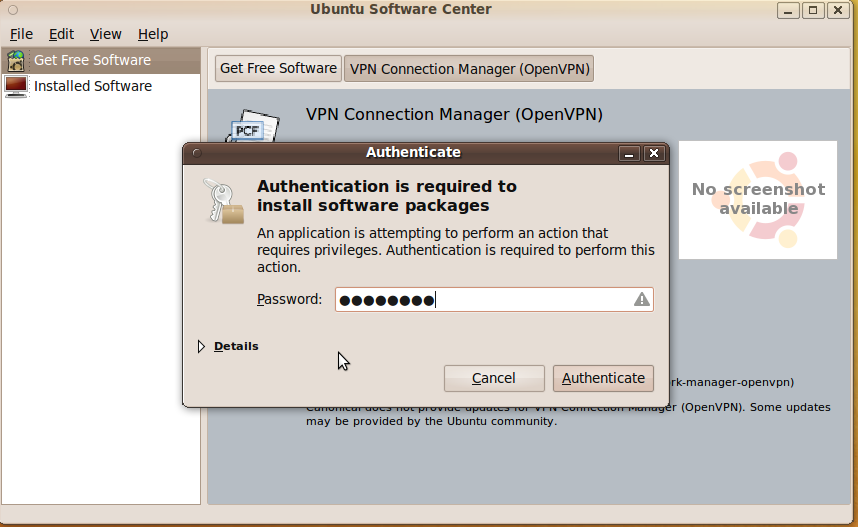
Click the “Install” button. Does the installation happen right away? No, not until you authorize it; this is Linux, not a virus-prone operating system:
Give it your user/administrator password and the installation will proceed:
Most times, Ubuntu 9.10 will show a progress bar (with percentages) over on the right, but this time it didn't. Apparently, “your mileage may vary.” At least you know that when the “In Progress” message disappears that your OpenVPN software is installed. Close out of the Software Center and proceed to Step #2.
STEP #2: Actually Setting Up the VPN Connection
Before we proceed, take note of several things:
- You must download the three files mentioned on the previous wiki page:
- AmahiHDAClient.crt;
- AmahiHDAClient.key; and,
- Ca-cert.ca
- AmahiHDAClient.crt;
- The actual VPN connection must be made from OUTSIDE your home network. You can't test your VPN setup (which presumes, like “E.T.,” that you're trying to “home phone” from somewhere else) if you're still INSIDE your home network. In my case, I explained to my patient neighbors what I needed to do and got permission from them to connect to their Wi-Fi router. (It helped the situation that I've helped fix and de-louse their computer on numerous occaisions.) Thus I could test this while at home, but still be “away” as far as the network was concerned.
All right. You have the files on your hard drive, and you and your laptop are somewhere else (perhaps quaffing a latte at Starbucks or increasing your cholesterol at McDonalds) and you're ready to set up your VPN connection. Here are the steps:
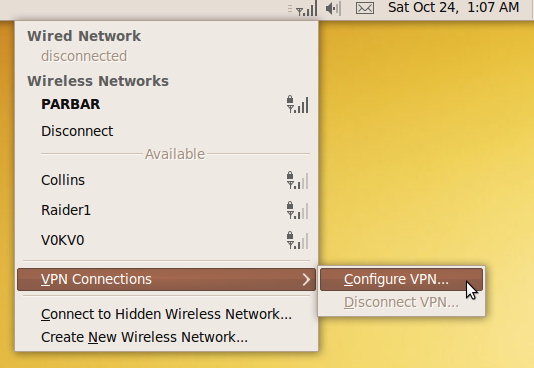
Left-click the wireless connection display up near the date and time in the upper right-hand corner of the screen. When you left-click, you should see the nearby wireless routers and an option you didn't notice before:
From the “VPN Connections” option, open the sub-menu and choose “Configure VPN...” That brings you to a tabbed dialog box with the VPN tab already chosen. Click on the “Add” button.
Now you'll choose a VPN Connection type. If the only VPN software installed on your system is Open VPN, this is the only option you have. Click on the “Create” button:
We'll be working with the following dialog box in the next few screenshots. When first presented it looks like this:


