Difference between revisions of "Clonezilla"
From Amahi Wiki
| (10 intermediate revisions by 3 users not shown) | |||
| Line 4: | Line 4: | ||
| − | [http://clonezilla.org/ Clonezilla] is | + | [http://clonezilla.org/ Clonezilla] is a Beta application for Amahi. It was originally meant to be a replacement for PBA (which is broken), however, it's fairly more complex to use than PBA. |
| − | |||
<!-- | <!-- | ||
== INSTALL GUIDANCE == | == INSTALL GUIDANCE == | ||
| Line 27: | Line 26: | ||
== HOW TO BACKUP == | == HOW TO BACKUP == | ||
| − | * Netboot into Clonezilla from the client you want to backup. | + | * Netboot into Clonezilla from the client you want to backup. You can also use the [http://clonezilla.org/download/sourceforge/stable/iso-zip-files.php Clonezilla Live CD]. Download the version you need and burn it to a CD. You can boot to it and then proceed as noted. |
* Choose your language. | * Choose your language. | ||
[[Image:clonezilla-1.png]] | [[Image:clonezilla-1.png]] | ||
| Line 58: | Line 57: | ||
== OTHER TUTORIALS == | == OTHER TUTORIALS == | ||
| − | [http://www.dedoimedo.com/computers/free_imaging_software.html Free Imaging software - | + | * [http://www.dedoimedo.com/computers/free_imaging_software.html Free Imaging software - Clonezilla & PartImage - Tutorial] |
| + | * [http://p9f.e2.sl.pt How to Use Clonezilla – A Hard Drive Cloning Tool For the Frugal Tech] | ||
| + | <br /> | ||
Latest revision as of 00:16, 17 May 2016
Clonezilla is a Beta application for Amahi. It was originally meant to be a replacement for PBA (which is broken), however, it's fairly more complex to use than PBA.
HOW TO BACKUP
- Netboot into Clonezilla from the client you want to backup. You can also use the Clonezilla Live CD. Download the version you need and burn it to a CD. You can boot to it and then proceed as noted.
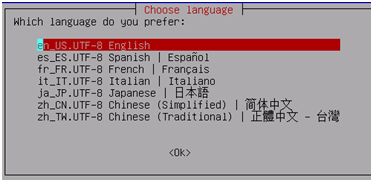
- Choose your language.
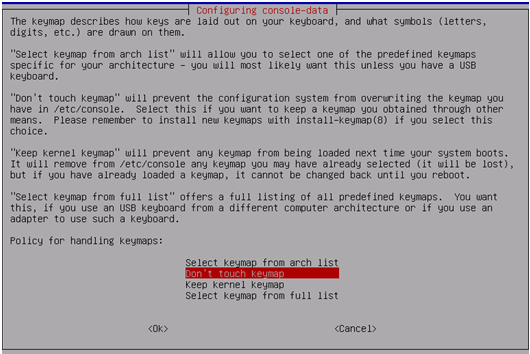
- Choose 'Don't touch keymap'. Recommend you DO NOT change this.
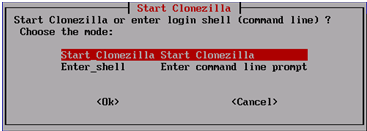
- Choose ‘Start_CLonezilla’ (Default).
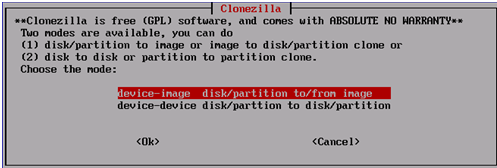
- Choose ‘device_image ‘ (Default).
- Choose ‘samba_server’.
- You will be prompted for IP address. Ensure this reflects the IP address of your HDA. Next you will be prompted for Domain. Leave this blank. The Account defaults to Administrator, but needs to be changed to reflect your HDA Admin User name. Finally, change the /images for Directory to /Drivebackups. When prompted for password, enter your HDA Admin User password. If successful, you will see some mounting info and be prompted to continue.
- Choose from ‘Beginner’ or ‘Advanced’ mode. Recommend you use Beginner mode unless you know what you are doing.
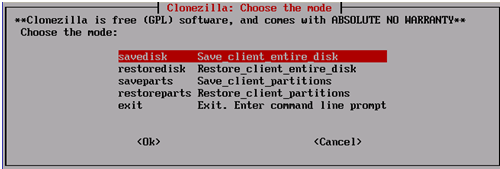
- Choose ‘save disk’ or ‘saveparts’ depending on your preference.
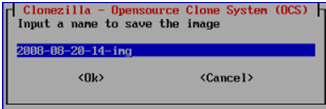
- When prompted to input a name for the image, you can leave it as is or add to it. Since it is just the date/time, I typically prefix it with the client host name I am backing up (i.e. HDA).
- Choose the client disk or partition you are backing up.
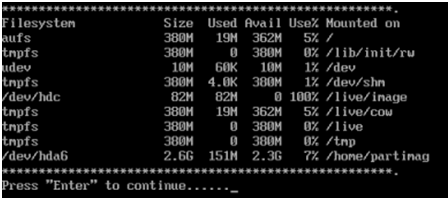
- Next, it will show you the command line you can enter next time if you want to do it via CLI versus using the GUI. This obviously is specific to your client. Press “Enter” to continue.
- You will then be asked ‘Are sure you want to continue?’ Answer y to proceed.
- It will then start backing up and tell you progress and estimated completion time. A 70GB drive takes about 45 minutes to back up on my network.
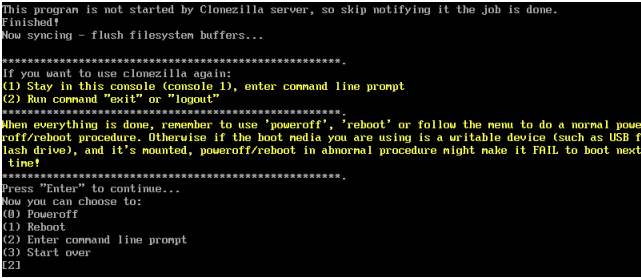
- Once finished, you will have the following choices. I typically reboot the client, but you can also shutdown the client.
- The process to restore an image is very similar.
OTHER TUTORIALS
- Free Imaging software - Clonezilla & PartImage - Tutorial
- How to Use Clonezilla – A Hard Drive Cloning Tool For the Frugal Tech

