Difference between revisions of "IPsec VPN"
From Amahi Wiki
| Line 1: | Line 1: | ||
| − | = | + | = iOS = |
| − | Go to Settings > Network VPN > IPSec | + | Go to Settings > Network VPN > IPSec, enter the settings below and click on Save. |
* Description: Amahi IPSec VPN | * Description: Amahi IPSec VPN | ||
| Line 12: | Line 12: | ||
* Proxy: leave it as off | * Proxy: leave it as off | ||
| − | |||
| − | [[Image:IPSec VPN.png]] | + | = iPhone 3, iPod Touch = |
| + | |||
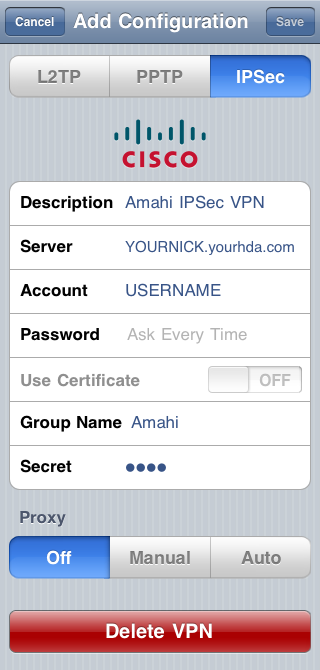
| + | It should look something like this (iPhone 3, iOS 4.x). | ||
| + | |||
| + | [[Image:IPSec VPN iPhone 3.png]] | ||
| + | |||
| + | = iPad = | ||
| + | |||
| + | |||
| + | [[Image:IPSec VPN iPad 2.png]] | ||
Revision as of 02:30, 11 July 2011
iOS
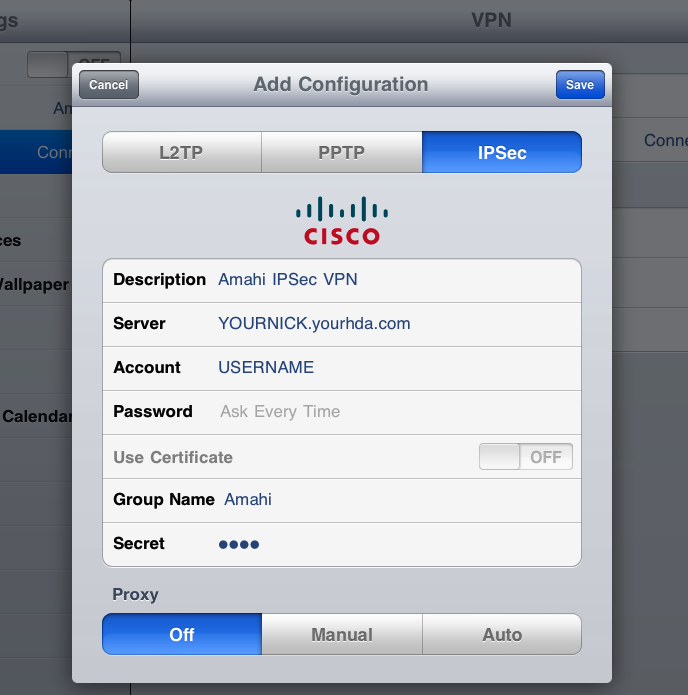
Go to Settings > Network VPN > IPSec, enter the settings below and click on Save.
- Description: Amahi IPSec VPN
- Server: YOURNICK.yourhda.com (put your Amahi dyndns address, nickname and host)
- Account: USERNAME
- Password: leave it as "Ask Every Time" or put one if you feel it's safe to leave it there
- Use Certificate: leave it as OFF
- Group Name: Amahi (with a capital A)
- Secret: this is the 4-character you got the when you installed the IPSec VPN app in your HDA
- Proxy: leave it as off
iPhone 3, iPod Touch
It should look something like this (iPhone 3, iOS 4.x).


