Difference between revisions of "IPSec VPN Windows Client"
From Amahi Wiki
(Created page with "= Windows 7 = Currently, Amahi only supports one IPSec VPN client for windows, a free client from Shrew Soft. (Report others that also work well please) * Download and install ...") |
m (moved IPSec VPN Windows to IPSec VPN Windows Client) |
Latest revision as of 01:04, 12 December 2011
Windows 7
Currently, Amahi only supports one IPSec VPN client for windows, a free client from Shrew Soft. (Report others that also work well please)
- Download and install the Shrew Soft Client. (Their Windows VPN Client download page may have more recent versions.)
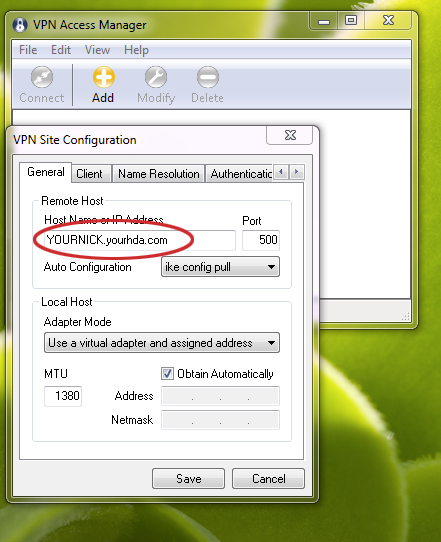
- Open the client, called VPN Access Manager and click on + (Add) to add a configuration
- Enter YOURNICK.yourhda.com. Replace YOURNICK with your actual HDA nickname, so that your DynDNS works.
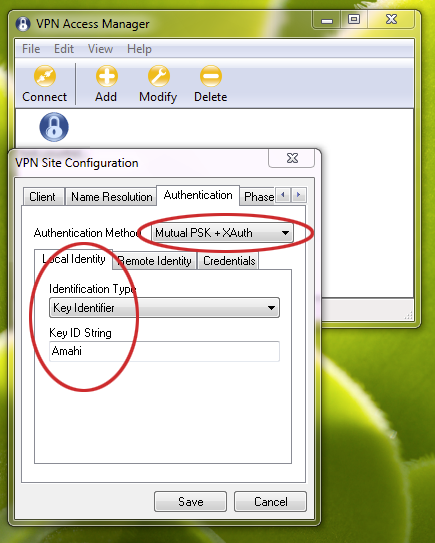
- Go into the Authentication tab
- Select Mutual PSK + XAuth
- Under the Local Identity tab, select Key Identifier, enter Amahi (this is called the Group Name and acts as an extra layer of protection)
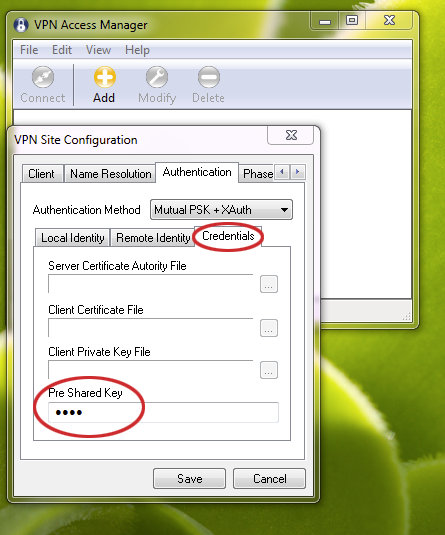
- In the Credentials tab, the Pre Shared Key should be ready to take the VPN secret obtained in the VPN web page inside your HDA.
- The rest of things should work as default
- Save
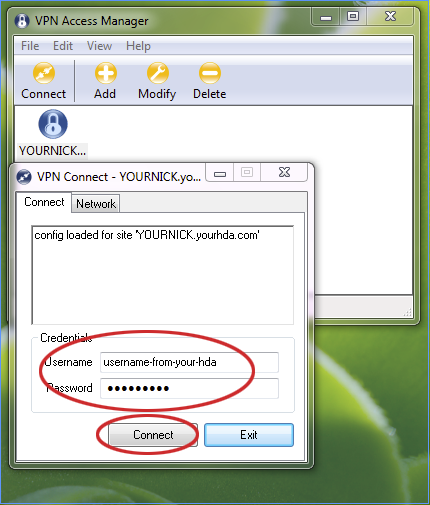
- Finally click on connect or double click on the profile for your VPN
- Input your username and password for a user in your Amahi HDA
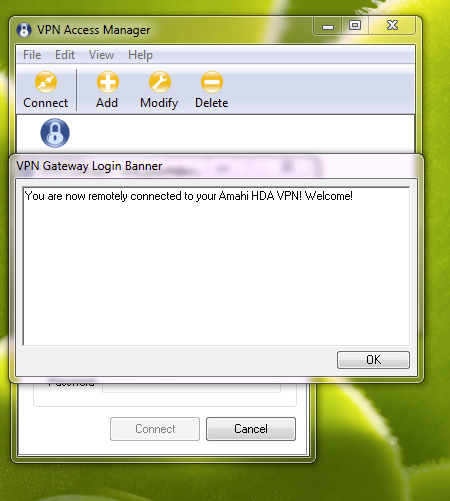
- If all goes well, you should be connected and you should see this welcome message:
- Press OK. To disconnect, close this window or press on Disconnect.
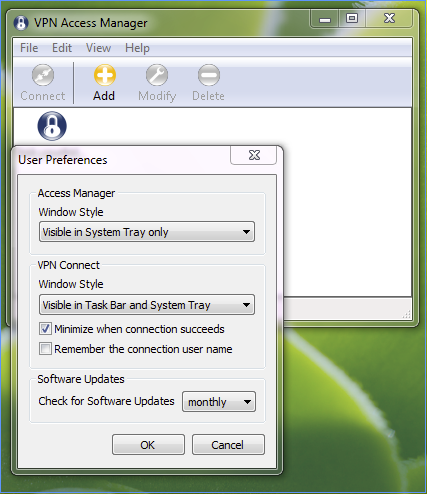
- For easy use, these are the recommended settings
- Enable it to be visible in the Tray only, so that it's less obtrusive when it connects
- If this is a computer you trust, you may want to also set the "remember the connection username", for even easier use
