Difference between revisions of "GettingStarted"
| Line 5: | Line 5: | ||
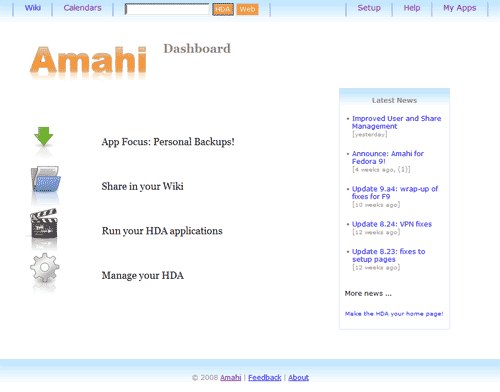
[[Image:Hda_start.gif|HDA startup page]] | [[Image:Hda_start.gif|HDA startup page]] | ||
| − | + | '''To get going we recommend the first things you do are:''' | |
| + | * Create a user to access shares | ||
| + | * Create a share for storing/sharing files in your network | ||
| + | |||
| + | ==Create A User== | ||
| + | To create a user | ||
| + | # use the setup link (http://setup) | ||
| + | # select the Users tab | ||
| + | # press the "New User" button | ||
| + | # enter information for the user and press the "Create button" | ||
| + | |||
| + | ==Create A Share== | ||
| + | To create a share | ||
| + | # use the setup link (http://setup) | ||
| + | # select the Shares tab | ||
| + | # press the "New Share" button | ||
| + | # enter information for the share and press the "Create button" | ||
| + | |||
| + | Once a share is created you can specify more details about it. | ||
| + | Click on the Share you just created and you can specify | ||
| + | * whether it is visible to users on your network | ||
| + | * which specific users can access (read) or write to the share | ||
| + | * what sort of information will be stored in the share | ||
| + | |||
| + | =Doing More with Your HDA= | ||
| + | |||
| + | Return to http://hda where you will find links to | ||
* Setup - where you can setup your HDA (http://setup) | * Setup - where you can setup your HDA (http://setup) | ||
| − | * My Apps - install/uninstall additional | + | * My Apps - install/uninstall additional [[HDA_Apps]] (http://hda/myapps) |
| − | * Wiki - your personal Wiki (http://wiki) | + | * Wiki - create and edit your personal Wiki (http://wiki) |
* Calendars - shared calendars for everyone in your house | * Calendars - shared calendars for everyone in your house | ||
| − | Of course there are a whole lot of other things you can do with your HDA (like use the VPN to have secure remote access, publish multiple calendars, etc). | + | Of course there are a whole lot of other things you can do with your HDA (like use the [[VPN]] to have secure remote access, publish multiple calendars, etc). |
| − | |||
| − | |||
| − | |||
| − | |||
| − | |||
| − | |||
Revision as of 21:09, 19 November 2008
OK. You've just finished installing your Amahi Home Server and rebooted it (we call it an HDA - Home Digital Assistant for short). Now what do you do?
Well, the first thing is to connect to your HDA from a computer on your network. Simply enter hda (http://hda) in the URL for your browser and you'll find yourself looking at your HDA home page.
To get going we recommend the first things you do are:
- Create a user to access shares
- Create a share for storing/sharing files in your network
Create A User
To create a user
- use the setup link (http://setup)
- select the Users tab
- press the "New User" button
- enter information for the user and press the "Create button"
To create a share
- use the setup link (http://setup)
- select the Shares tab
- press the "New Share" button
- enter information for the share and press the "Create button"
Once a share is created you can specify more details about it. Click on the Share you just created and you can specify
- whether it is visible to users on your network
- which specific users can access (read) or write to the share
- what sort of information will be stored in the share
Doing More with Your HDA
Return to http://hda where you will find links to
- Setup - where you can setup your HDA (http://setup)
- My Apps - install/uninstall additional HDA_Apps (http://hda/myapps)
- Wiki - create and edit your personal Wiki (http://wiki)
- Calendars - shared calendars for everyone in your house
Of course there are a whole lot of other things you can do with your HDA (like use the VPN to have secure remote access, publish multiple calendars, etc).

