Hosting a website
- To access the HDA itself from outside the network using VPN, check out the Adito application, available to install through the HDA. Adito enables you to access the HDA, and all applications and folders, using just your free username.yourhda.com webaddress.
So you want to run a web server in your Amahi server and make it visible from the web outside your home.
NOTICE: making anything visible outside your network can open security issues, so you are doing this at your own risk. Some apps are more secure than others, but there is nothing ultimately secure. Best is to use the VPN to login back home."
Contents
Requirements
For the purposes of this guide you need either of the following:
- VNC access to your HDA if headless
- Terminal is available under Applications -> System Tools -> Terminal
- Ajaxterm if headless and no VNC
- A monitor if you are not headless
To host your own web site you need the following:
- Forward a port to your HDA ip address, either for plain insecure http: 80, for https, 443 (advanced users can use other ports). Some routers call this or require a "virtual server"
- Chose a domain name that you own (or your free username.yourhda.com that comes with Amahi). This is how the app will be accessed outside
- Chose the app you want to make accessible outside, let's say, yourwebappname
Hosting a single Webapp
What you need to do in a terminal (as root) is find the apps conf file then edit the conf file for the app:
    su
    [enter password]
    ls /etc/httpd/conf.d
Find your app .conf file. It will look like 10##-yourwebappname.conf
nano /etc/httpd/conf.d/10##-yourwebappname.conf
Your conf file should look something like this at the top of the page:
<VirtualHost *:80>
       ServerName app
       ServerAlias app.YourDomain.lan
Add this (immediately after the ServerName directive):
ServerAlias username.yourhda.com
So it looks like this:
<VirtualHost *:80>
       ServerName app
       ServerAlias app.YourDomain.lan
       ServerAlias username.yourhda.com
You can add more server aliases if you want to access the app under those names (for example: ServerAlias myphotos.DomainName.com). Once you are satisfied with the server aliases, you may save and quit nano by following these steps in Windows:
    ctrl X
    At the prompt, type "y" to save
    At the prompt, hit "Enter" to save the file
Restart the server using:
service httpd reload
And you are done, enjoy your website.
Hosting multiple Webapps
If you wish to have access to multiple webapps, described below is one way to accomplish this:
- obtain a domain name (i.e., via godaddy.com) --for example yourdomain.com
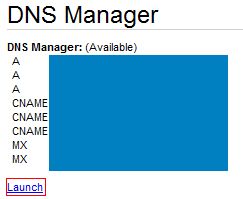
- for each web app you wish to have access to, establish a CNAME or subdomain--for example something.yourdomain.com---and point it to username.yourhda.com (for example see http://help.godaddy.com/article/679 )
- edit the webapp .conf file (see above) to match the CNAME/subdomain you just established by adding ServerAlias something.yourdomain.com
- don't forget to restart the server each time you edit a .conf file.
- For example, you could create the subdomain/CNAME: address.yourdomain.com for the AddressBook webapp---point that subdomain to: username.yourhda.com---in the AddressBook .conf file add: ServerAlias address.yourdomain.com---restart the server---you are done, enjoy using multiple webapps!
Hosting a Website
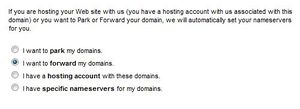
Prerequisites: The first order of business is to make sure that your domain name is pointing to your server's IP address. Each website is different, but GoDaddy goes like this:
- Go to your GoDaddy's My Account page. Under Dashboard, click yourdomain.com
- Now go back to your account homepage, and instead of clicking yourdomain.com, check it and click View in Domain Manager
- The effects should appear within one hour
Hosting: Hosting a website on your HDA server is basically the same as hosting a webapp, so if we are able to do the previous guides on hosting a webapp(s) the rest will be a cinch.
We will create the website by creating a webapp. This is a lot easier than it sounds, so don't give up just yet!
- Got your HDA page (http://hda or http://hda.yourhda.com), click Setup and go to Settings.
- Make sure your Advanced Settings option is checked (if not, check and click OK past the warning)
- Go to Apps and then Webapps
- At the very bottom, click New Web App and type in a name like Website
- This is where your webpage will reside in, you can name this anything you'd like. This is not the title of your website or webpage. Website will be used as the name for this guide

- Do everything as told above under the "Hosting a single Webapp" heading above, but of course our app is called Website.
- Hint: Instead of using user.yourhda.com for your ServerAlias, go ahead and use yourdomain.com (without the www.) if you have one from, for example, GoDaddy.
- To easily access your website files, we will make the webapp folder a share by doing the following:
- In your HDA Dashboard, click Setup and then Shares
- Click New Share at the very bottom
- We will name our share Website
- Click Create this Share, now the folder will be available from your normal \\hda spot.
- You can test your new website by creating an index.html (put something simple, like "hi", as a text) in the html folder in your Website share folder, and then going to yourdomain.com
And we are finished. To create your website on Fedora, we can use Bluefish program.
- yum install bluefish
If we would like to use Windows, we can use any program to make the website. Just drag and drop into the share, and under the folders as needed.
FAQ
- Q: Do i need to do anything for
username.yourhda.comto work?
No. That comes free and automatically set up with your Amahi HDA
- Q: What if i want to do it for a .html or .php file?
     You can do this by creating a Webapp of your own. In the apps tab,
     select Webapps and create a new one.
     What you do is, create a web app, and put the files into the root
     directory of the webap, something like this directory:
/var/hda/web-apps/yourwebappname/html
     this directory belongs to apache. you will have to change the
     ownership to your user (recommended) or otherwise add things as root.
- Q: How do I change the ownership?
You can do this by going to the command screen:
        su -
        {password}
        chown {user} /var/hda/web-apps/


