Key-Based SSH Logins
This page shows the way to create a key based SSH login to your server (the ability for no password and safe connection) with Windows putty client and Mac OS X's Terminal.app
# Key-Based SSH Logins with OS X's Terminal.app
Coming Soon...
# Key-Based SSH Logins with Windows putty application
- Install Putty and PuttyGen on your windows desptop
Download the following files from the PuTTY download page and save them on your Windows system, e.g. on the desktop:
http://the.earth.li/~sgtatham/putty/latest/x86/putty.exe
http://the.earth.li/~sgtatham/putty/latest/x86/puttygen.exe
Both files are self contained executables. That is: they do not install anything but run from where they are saved.
- Create a profile for use with our Amahi HDA
In PuTTY, you can create profiles for connections to your various SSH servers, so you don't have to type in the settings again when you want to connect to a certain server again.
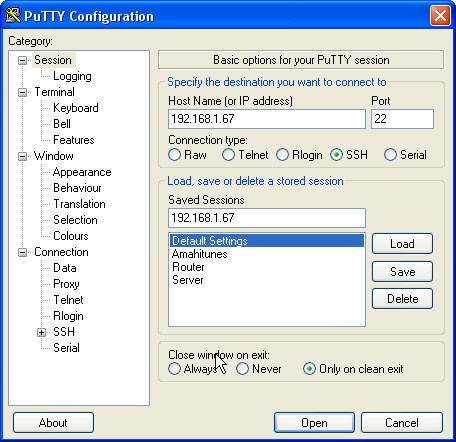
Now we will create a profile for our 192.168.1.67 server. Start PuTTY by double-clicking its executable file. You are now in the category Session (see the tree on the left side of the screenshot). Enter 192.168.1.67 under Host Name (or IP address), enter 22 under Port and select SSH under Protocol.
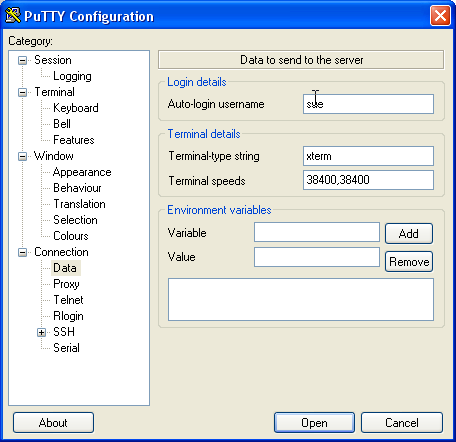
Now select 'Connection >> Data in the Catagory box and in the Auto-login box enter the username you wish to login to your HDA with. In this example 'sue'.
Once this is done return to your Sessions and give your profile a meaningful name and press save. Anytime in the future you can click on your profile name a Open and your session is opened. You will appreciate this more later.
- Connecting to your HDA using ssh
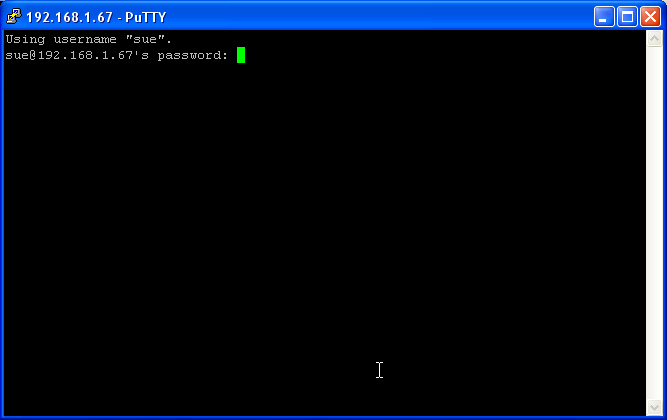
Now you are on your 'Sessions' screen lets open our session by pressing open. You should see:
Type in the users password and you have your ssh xterm ready to go. Now this was the normal way of logging in but being a password system it is open to brute force attacks.
- Generating a public/private key pair
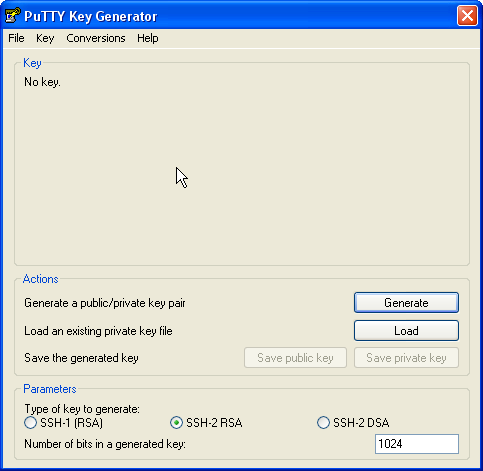
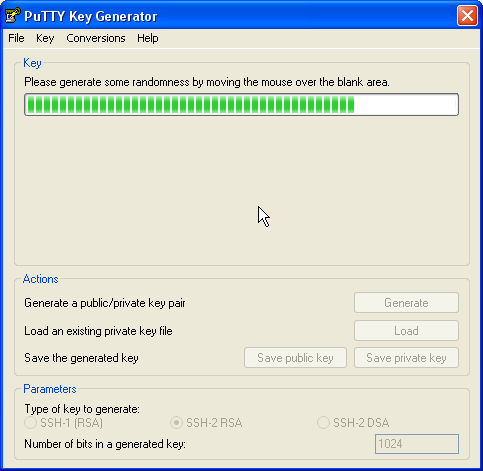
Here we can use PuTTYgen to create a private/public key pair. Start it by double-clicking its executable file. Make sure you select SSH-2 RSA under Type of key to generate and specify 1024 as the Number of bits in a generated key. Then click on Generate:
Move your mouse about randomly to generate the randomness.
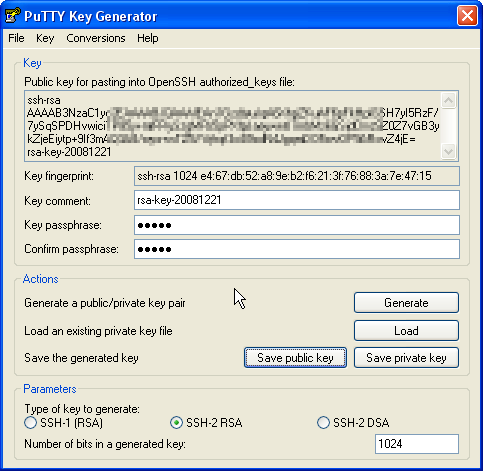
Now a private/public key pair has been generated. Under Key comment, you can enter any comment; normally you use your email address here. Then specify a Key passphrase and repeat it under Confirm passphrase. You'll need that passphrase to log in to SSH with your new key. Then click on Save public key and save it in some safe location on your computer. You are free to choose a filename and extension, but it should be one that lets you remember for which system it is.
Then click on Save public key and save it in some safe location on your computer. You are free to choose a filename and extension, but it should be one that lets you remember for which system it is.
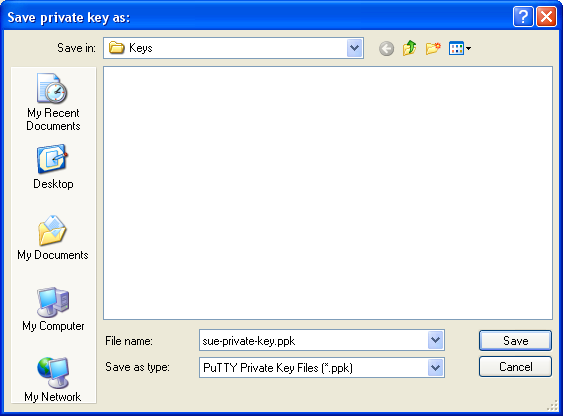
Then click on Save private key. You can save it in the same location as the public key - it should be a location that only you can access and that you don't lose! (If you lose the keys and have disabled username/password logins, then you can't log in anymore!) Again, you're free to choose a filename, but this time the extension must be .ppk:
- Save the public key on our Amahi server
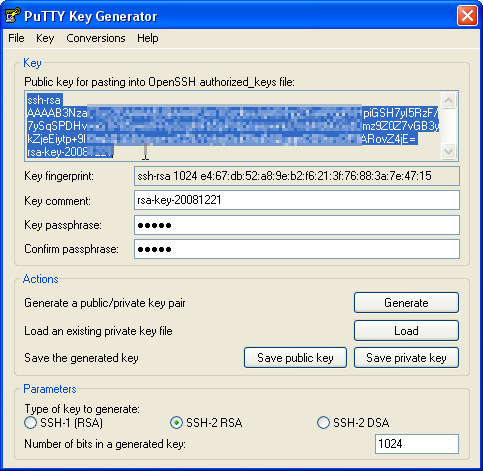
Now we must transfer the public key to our Amahi HDA server. Copy the key from the PuttyGEN window:
Using putty logon to our Amahi HDA using the profile you created earlier.
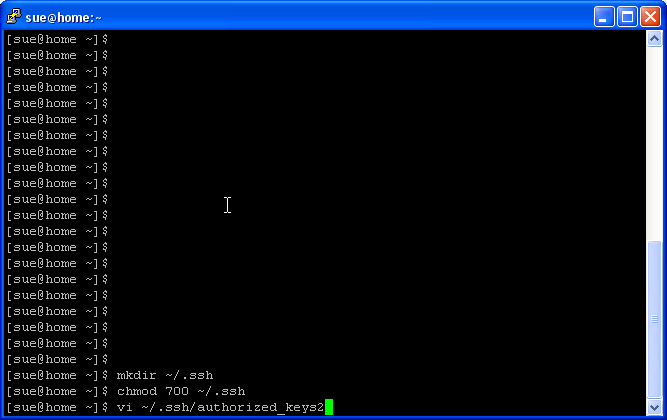
We must now create a directory and file in which to store our public key
chmod 700 ~/.ssh
And open our file that will store our key
Type I to enter insert mode. Paste your copied key (just a right click of the mouse was enough for me. Then <Escape> :wq to exit edit mode, write the file and quit. This file may already exist if you have used ssh before.
Now to make that file accessible by only the user
- Configuring putty to use public/private keys
Close down your shell to your HDA and restart putty and load your 192.168.1.67 profile
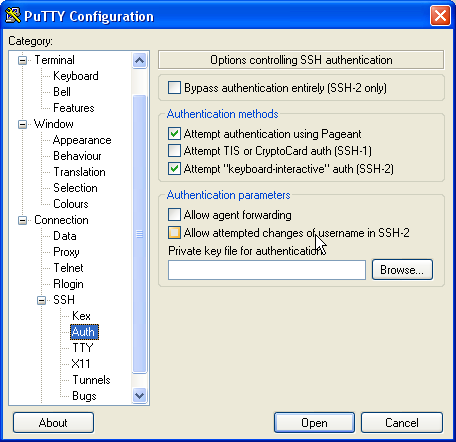
Go to SHH >> Auth and click on Browse
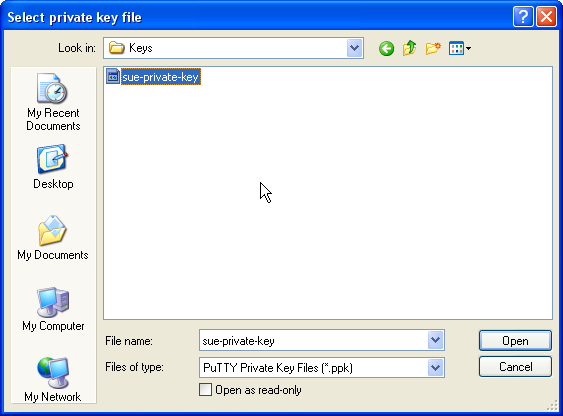
Broswe to the folder where you saved your keys and select the private key. The one with the ppk suffix.
Go back to your Session tab and click save.
Our private key is now attached to our profile
- Our key-based logon
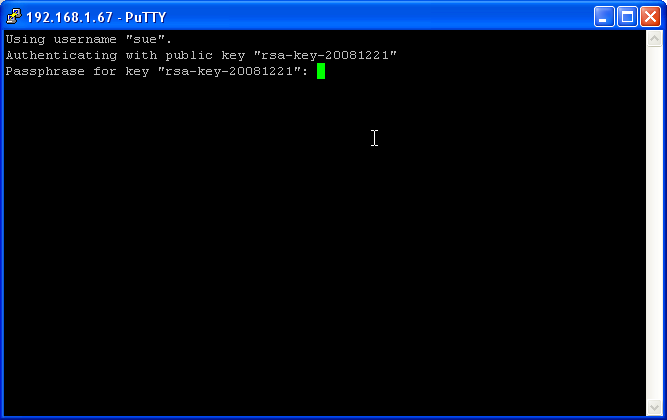
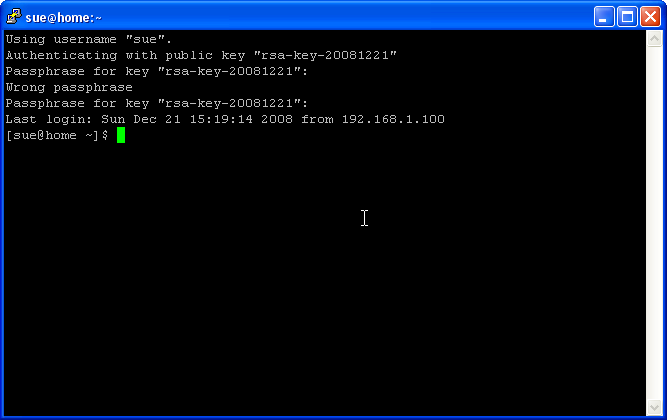
Now on our puuty sessions screen load your 192.168.1.67 profile and press Open. You should get:
Enter you passphrase that you input when generating your keys.
- Making it that tad more secure
Up to now, you can log in with your private/public key pair and still with username/password logins, so if someone doesn't attach a private key to his PuTTY session, he will be asked for a username and password. So to achieve a better security, we must disable the username/password logins (you should do this only when you know that your key-based logins are working, because if they aren't and you disable username/password logins, then you have a problem...).
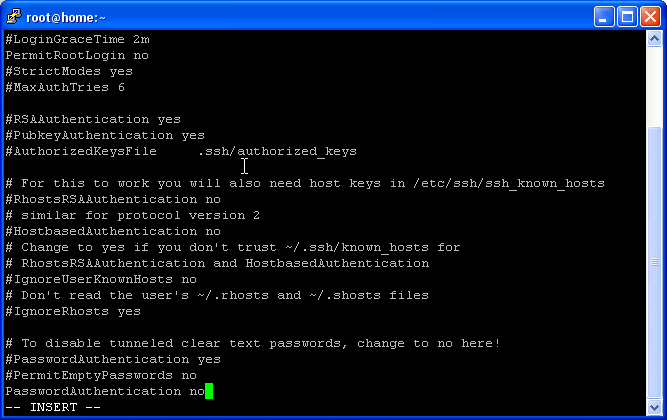
To disable the username/password logins, we must modify the sshd configuration file. On our Fedora based Amahi system, it's /etc/ssh/sshd_config. You should set Protocol to 2 (1 is insecure and should not be used!), PasswordAuthentication to no.
Login as root:
vi /etc/sshd/sshd_config
You will now need to restart you SSH server
