Amahi in ESXi with greyhole
| WARNING | |
|---|---|
| This is recommended only for advanced users, proceed with caution. |
Contents
Amahi in VMware ESXi with Greyhole
This tutorial will skip installation of ESXi but note that if you are installing ESXi 5.5 on consumer hardware it is likely network or storage drivers will not be on the default installation disk. You can either add your own or create a custom .iso file with the network drivers bundled with the installer.
When performing the installation of ESXi you will need to have at least one local disk to do the installation and use as a data store for your VMs. For Amahi with Greyhole we will use all other drives in "Raw Device Mapping" mode and attach them directly to the Amahi VM.
Some quick points to cover about using Greyhole drive pooling within this setup..
- It is not advisable to use Greyhole pooling with drive images (instead of physical drives) due to the added overhead and I/O delay that can be introduced. It will slow down your Proxmox machine and your Amahi file server
- This process does work with any Amahi version and installation method, however if Greyhole isn't fully functional with a release of Amahi, it's not advisable to use Greyhole in this case.
- When the physical drive is added to the VM, it will not show up as a data store inside of the ESXi host. Rather all disk and partition management will be done directly in the Amahi VM.
Prerequisites
This guide is written for the following software configuration:
- Amahi 7 (Express CD)
- VMware ESXi 5.5
That does not mean these steps will not work with your setup. Just that your setup may be different and you will need to do troubleshooting on your own.
This guide will also assume you already have ESXi installed on your hardware, VMware vSphere Client on your laptop, and an Amahi VM already running on your hypervisor. If you are not sure how to do any of those above steps, this guide/setup may not be for you as it involves configuring advanced, and unsupported, hard drive setups inside ESXi
Configure ESXi Raw Device Mapping (RDM)
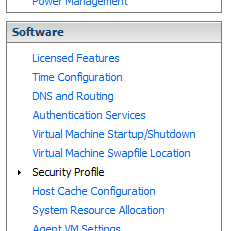
Start by enabling SSH on the ESXi host. From vSphere Client highlight the host and click the Configuration tab. Then under the software section click security profile.
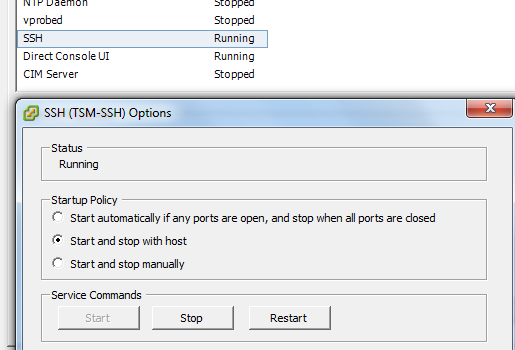
Next under services click on properties, scroll down and select SSH and then click on properties. Then click on options and start the service. You also can optionally set the service to start automatically with the host.
SSH into the ESXi host with your root credentials.
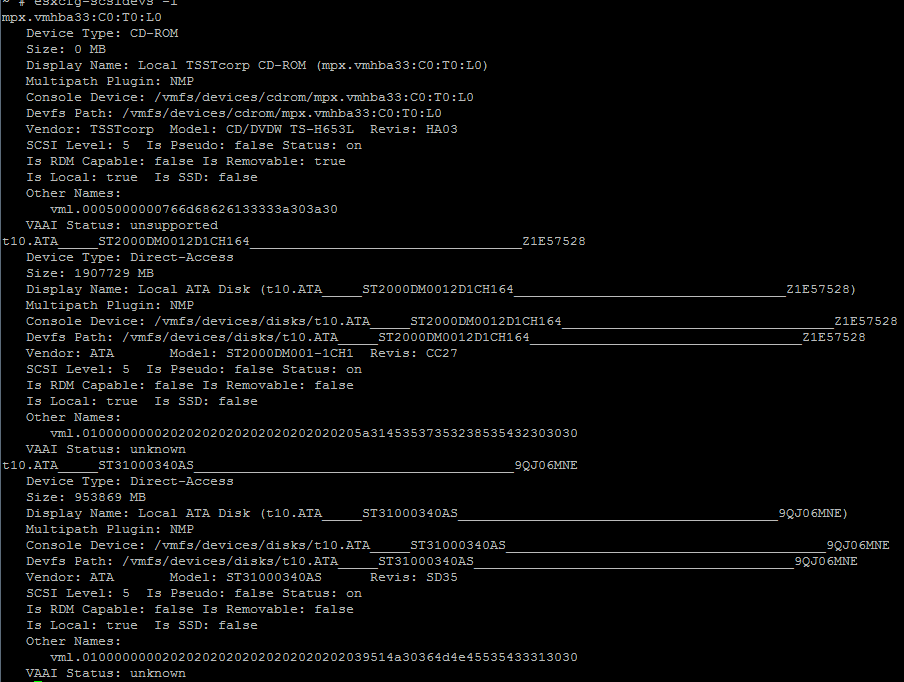
Run the following command to list the disks your ESXi host knows about
TIP: You need to know which hard drive you want mapped to your Amahi server and it helps to know the serial number of the drive to identify it on the list
esxcfg-scsidevs -l
You will want to locate your disk and copy the "Devfs Path" In the screenshot above the disk I am using is /vmfs/devices/disks/t10.ATA_____ST2000DM0012D1CH164__________________________________Z1E57528
Next cd into your /vmfs/volumes folder and run ls to see what datastores are available on your ESXi host.
cd into your data store folder and make an rdms folder to keep things in one place. Run the following vmkfstools command to create a raw device vmdk file.
vmkfstools -z /vmfs/devices/disks/t10.ATA_____ST2000DM0012D1CH164__________________________________Z1E57528 ./rdms/rdm0.vmdk -a lsilogic
In the above screenshot you will see two different devices. One is 750 Gb and the other is 2 Tb. You can see both devices base on the *-rdmp.vmdk files.
Add RDM Device to Amahi VM
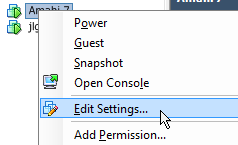
After your VM has been created right click on the server in the vSphere Client or the vSphere web interface and go to "Edit Settings".
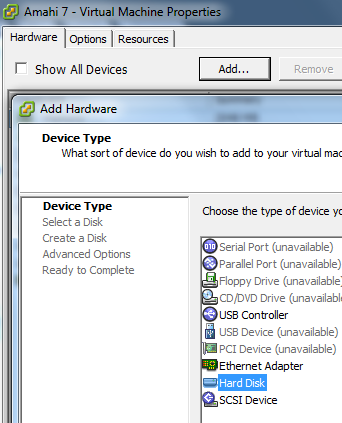
On the hardware tab click Add and then select Hard drive from the list of devices to add.
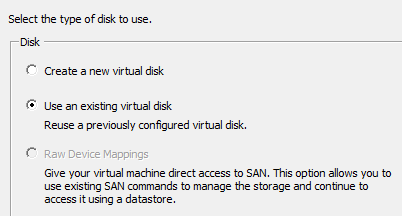
Click Next and then select the radio button for "Use an existing virtual disk".
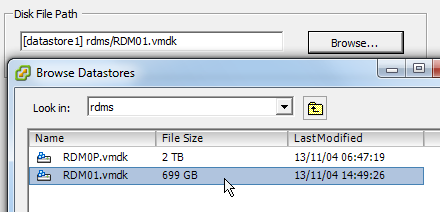
Click browse and navigate to the datastore and then rdms folder you created earlier. Next select the vmdk device associated with the disk you want to map.
On the next step map sure you select a new SCSI controller for your physical disks. Because my OS is a virtual disk on SCSI 0:0 in the screenshot I use SCSI 1:X for my physical RDM disks
One the host has been [re]booted you should be able to view the new disks using `fdisk -l` and follow the Adding a second hard drive to your HDA guide to add the storage to greyhole.
Helpful links
http://www.vm-help.com/esx40i/SATA_RDMs.php
http://forza-it.co.uk/esxi-5-1-using-raw-device-mappings-rdm-on-an-hp-microserver
http://www.vmware.com/support/developer/vcli/vcli41/doc/reference/vmkfstools.html
