IPsec VPN
From Amahi Wiki
We now have a new IPsec VPN app for your HDA.
This VPN stack has many advantages, although it still requires two ports to be forwarded from your router to your HDA. These are
500 UDP and 4500 UDP
UDP, not TCP.
Below is how you set up
iOS Setup
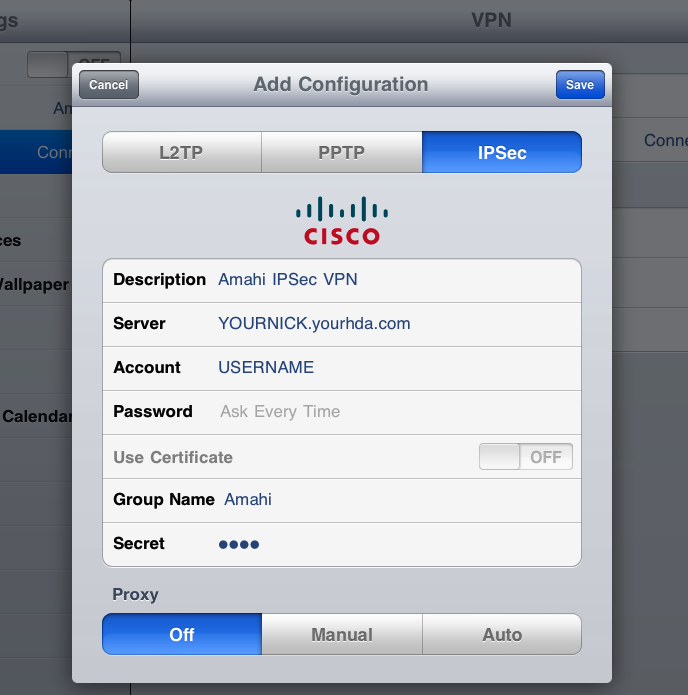
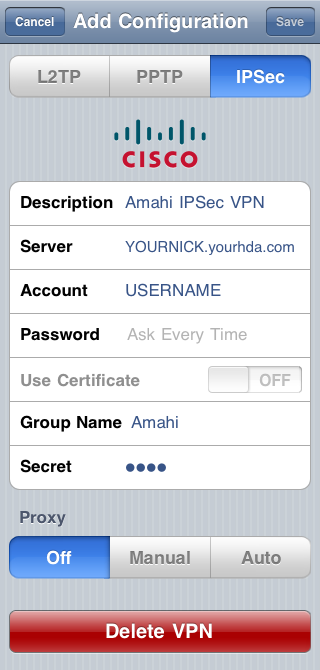
Go to Settings > Network > VPN > IPSec, enter the settings below and click on Save.
- Description: Amahi IPSec VPN
- Server: YOURNICK.yourhda.com (put your Amahi dyndns address, nickname and host)
- Account: USERNAME
- Password: leave it as "Ask Every Time" or put one if you feel it's safe to leave it there
- Use Certificate: leave it as OFF
- Group Name: Amahi (with a capital A)
- Secret: this is the 4-character you got the when you installed the IPSec VPN app in your HDA
- Proxy: leave it as off
Below you can see how the setup area looks in a few Apple iOS devices.
iPad
It should look something like this on the iPad 2, iOS 4.x
iPhone 3, iPod Touch
It should look something like this on the iPhone 3, iOS 4.x
Windows 7
Currently, Amahi only supports one IPSec VPN client for windows, a free client from Shrew Soft. (Report others that also work well please)
- Download and install the Shrew Soft Client. (Their Windows VPN Client download page may have more recent versions.)
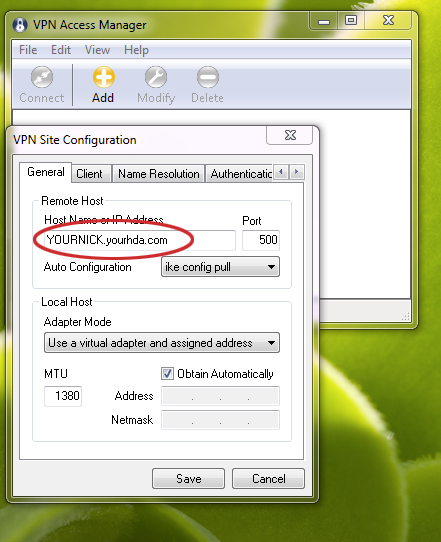
- Open the client, called VPN Access Manager and click on + (Add) to add a configuration
- Enter YOURNICK.yourhda.com. Replace YOURNICK with your actual HDA nickname, so that your DynDNS works.
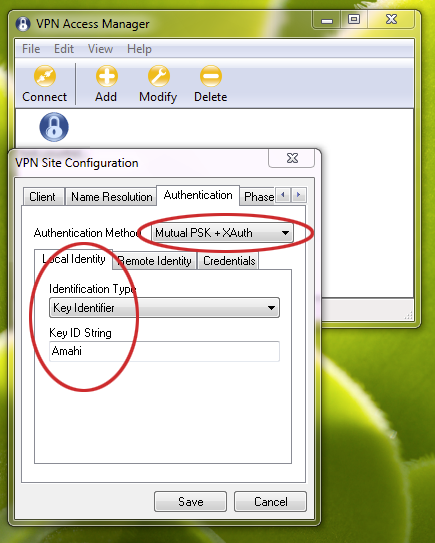
- Go into the Authentication tab
- Select Mutual PSK + XAuth
- Under the Local Identity tab, select Key Identifier, enter Amahi (this is called the Group Name and acts as an extra layer of protection)
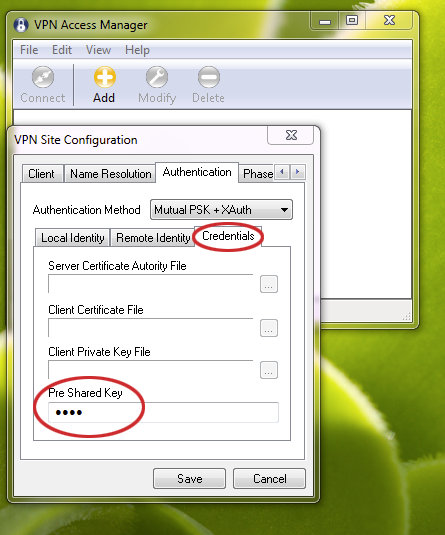
- In the Credentials tab, the Pre Shared Key should be ready to take the VPN secret obtained in the VPN web page inside your HDA.
- The rest of things should work as default
- Save
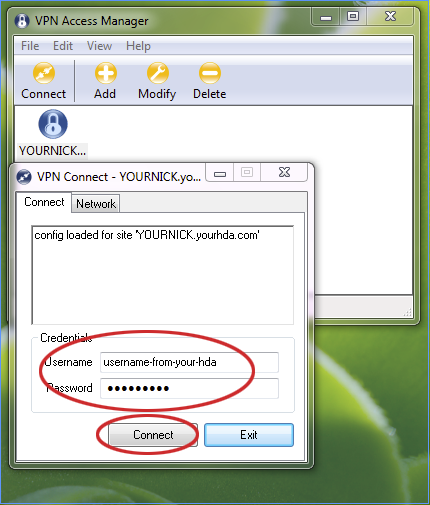
- Finally click on connect or double click on the profile for your VPN
- Input your username and password for a user in your Amahi HDA
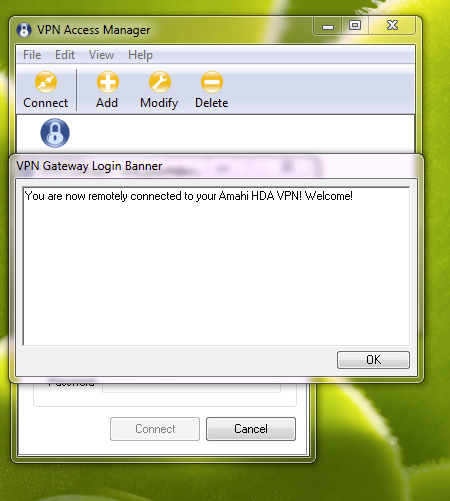
- If all goes well, you should be connected and you should see this welcome message:
- Press OK. To disconnect, close this window or press on Disconnect.
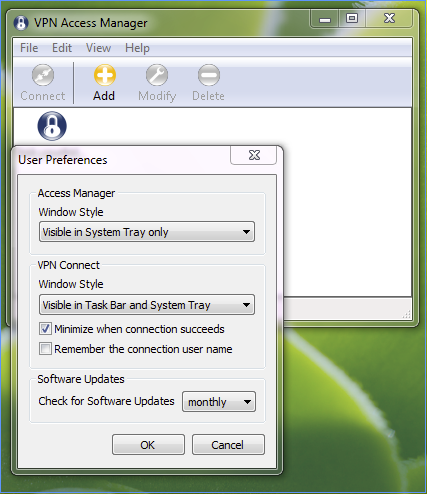
- For easy use, these are the recommended settings
- Enable it to be visible in the Tray only, so that it's less obtrusive when it connects
- If this is a computer you trust, you may want to also set the "remember the connection username", for even easier use
Max OS X Setup
Similar to iOS.
