SuperDuper!
SuperDuper! only works on OS X (Apples operating system for the Mac)
A little info on SuperDuper! It is free, but some features are locked in the free version, like scheduled backups and other sorts of things.
Personally I do use this (bk) and I did pay for it, it is a great backup solution for over a network, however, it is very slow. Backups to a network volume are saved as Read/Write bootable sparce images.
They have a wonderful feature though, its called Smart Update. Smart Update allows for the next time you backup, it only backs up the changed files from the last backup, which makes it alooot faster.
If you feel that this is slow and want to change, try backing up with your Mac device plugged up with an ethernet cord for the first time, after that backups over the wireless AirPort will be a breeze. (I have talked to the maker and he said that backups that big over wireless are common to be very slow, he recommended I backup as well with an ethernet cord the first time.)
Ok first off, we need to mapp the drive (HDA) and folder where you want to place your files (Share folder).
- First right click on the finder in the dock and select "Connect to Server":
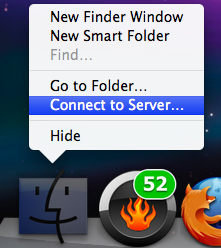
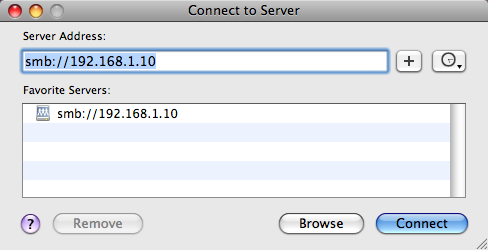
- A window will pop up asking you to enter your servers ip address (this is the ip you selected when installing Amahi), enter as shown below:
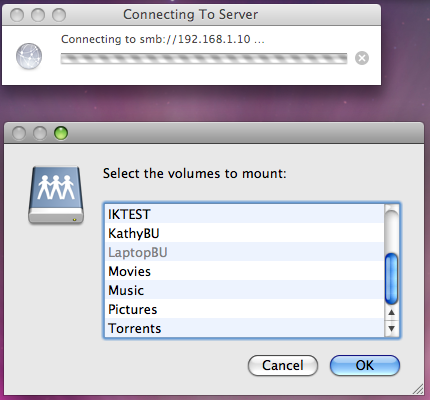
- Next it will say connecting, and ask for you to select the folder you want to mapp as well (share folder) as shown below:
- In turn this will show your network in the driver, but not the volumes(s) you slected, but dont worry, were getting to that.
- A window will pop up asking you to enter your servers ip address (this is the ip you selected when installing Amahi), enter as shown below:
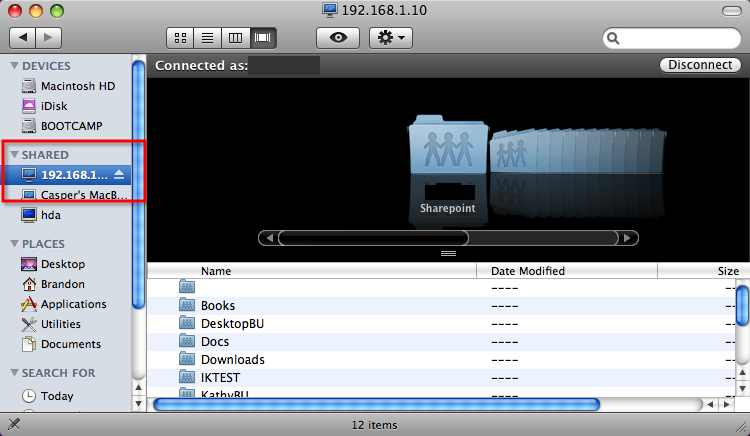
- To get the drive to show up with the other drives of you Mac (ie in the sidebar) go to the folder in your mapped server and right click it and select "Show original":
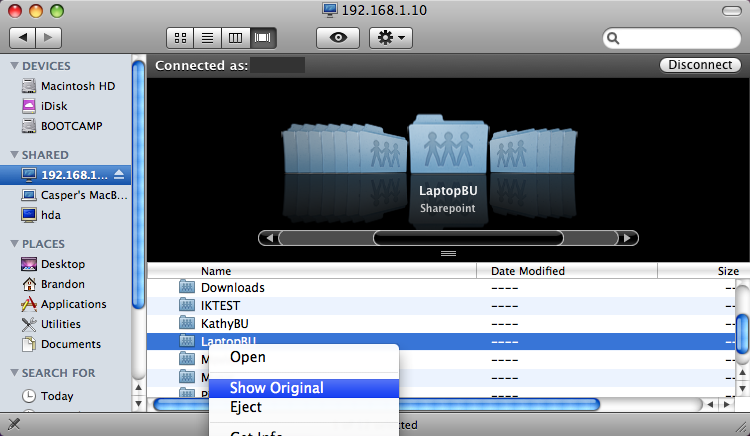
- Then you will see a screen showing the drive, just drag it over to the sidebar and wala, its there.
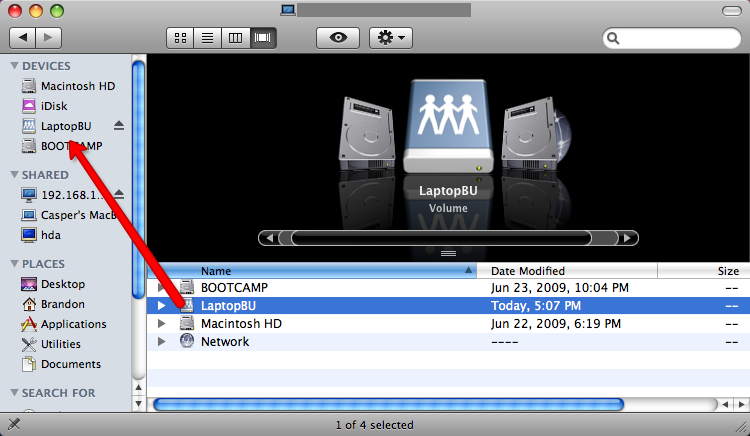
Thats all for the drive mapping, now on to the fun part.
- Now to start off with starting the backup, the first screen you come to will look as follows.
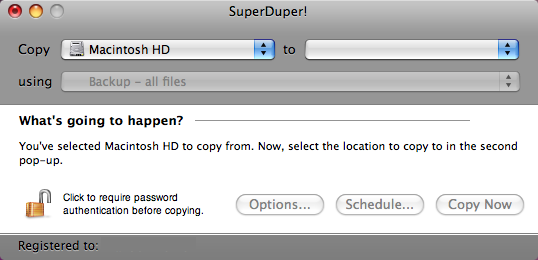
- Next you will want to select what drive you want to copy to, to backup over the network, it has to be saved as disk image (sparseimage).
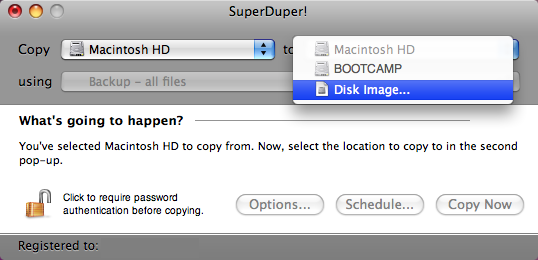
- Next it will ask you to select the name of the image you want it to be, and where to save it, also make sure you make it a read/write sparse image. I chose the name of mine to be OSX10.5. Then click save.
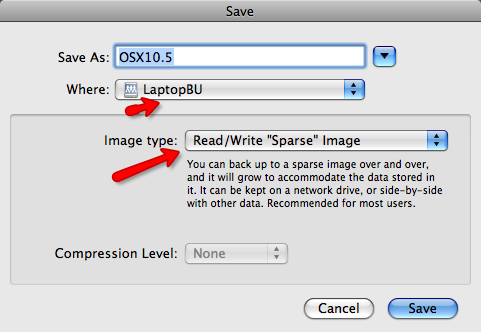
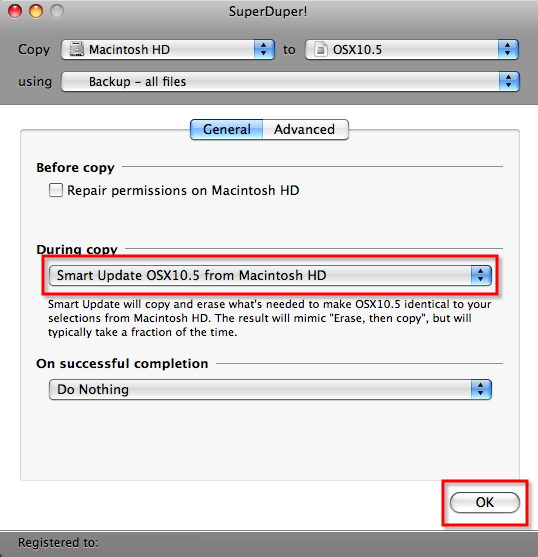
- After this, go into options and select Smart Update to YourImage from HD. This will allow for the next update to only update changed files and folders. Then click OK.
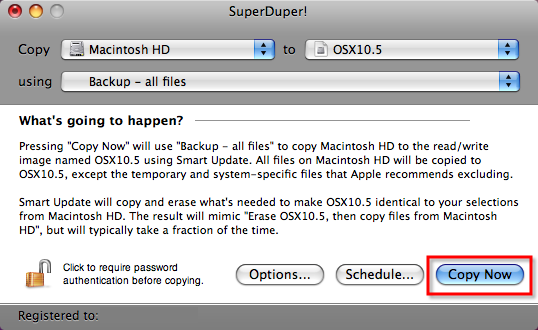
- Next you will select "Copy Now".
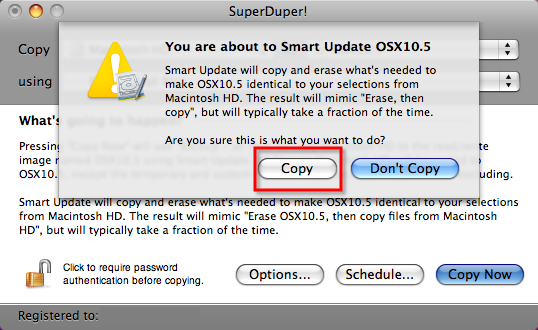
- Now you need to secect "Copy" again.
- And lastly, your all set and you will see it step by step what it is doing (remember, the first backup takes the longest, and takes even longer depending on drive size).
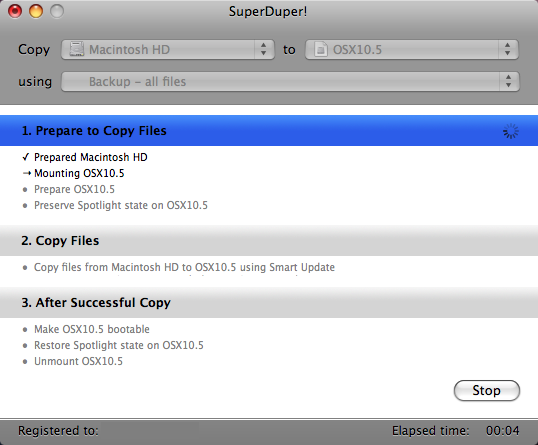
- Next you will want to select what drive you want to copy to, to backup over the network, it has to be saved as disk image (sparseimage).
If there is any problems with this tutorial, you can come to the irc channel and I will be there, just ask for bk.
If you have any other questions or information on this product go to the SuperDuper! website and visit their forums.
