Owncloud Applications

|
Work In Progress |
|---|---|
| This article is currently undergoing major expansion or restructuring. You are welcome to assist by editing it as well. If this article has not been edited in several days, please remove this template. |
Initially an ownCloud instance provides a minimal set of applications after installation (Files, Pictures). Many applications are available as “one click” installations that are automatically downloaded, installed, and “enabled” via the ownCloud administration user account. Other applications have to be downloaded from the ownCloud AppStore, installed, and "enabled" manually.
"Core" applications are supported by the ownCloud project developers where third party applications are supported “as-is” by their contributing authors. Many third party applications were developed for specific ownCloud release versions. In some cases an application "might" work in two ownCloud versions. The ownCloud “Apps” administration only displays applications that are rated as "Official" or "Approved" for the installed instance of ownCloud. There are a large number of applications that are not displayed on the ownCloud "Apps" list but they can be manually installed. Applications that have to be manually installed are usually rated as "Experimental".
Please Note:
Like a lot software in the Open Source world when there is a new version release (ownCloud upgrades/updates), any software written by a "third party author" may not work as expected with the new release. It takes time for the third party authors to update their software to work with the new release. So as they say, "Patience is a virtue".
Contents
Application Ratings
ownCloud applications have a rating system that helps determine the current stability and maintainers of an application.
Application Ratings:
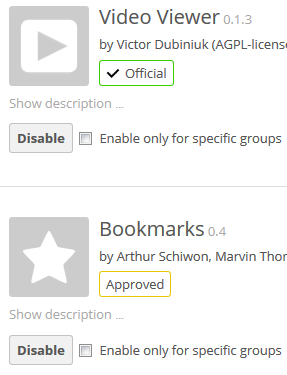
- Official - Applications developed by "core" ownCloud developers; providing functionality deemed important for the vast majority of ownCloud users; stable; and that fit well in the ownCloud.
- Approved - Applications developed by "trusted" developers; have passed a cursory security and design check; maintained and openly developed; deemed stable for normal use.
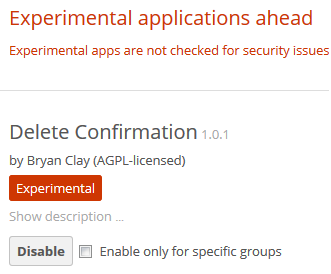
- Experimental - Applications that are new and/or not yet stable and/or have not been reviewed for security issues.
"Official" and "Approved" applications can be installed and enabled from the "Apps" settings in the ownCloud Administrator account. "Experimental" applications must be installed manually.
Installing/Enable an ownCloud Application
A new ownCloud is installed with a minimal set of "enabled" applications while others are in a "Disabled" state. Once an application is "Enabled" it will be available to current ownCloud instance users. Other applications (Experimental) have to be downloaded from the ownCloud Applications Store, installed, and "Enabled". The App "Bookmarks"(Experimental) will be used to demonstrate the installation of an ownCloud application.
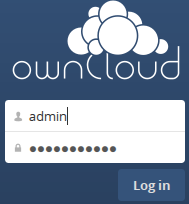
- To Enable the application the administration ID will have to be used.
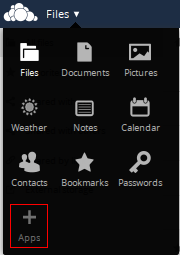
- Click on the dropdown Menu and select the "Apps" item.
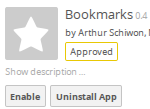
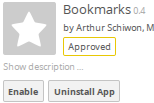
- One the left side menu, click on "Not Enabled". Moving down the list of applications until the name "Bookmarks" appears. Click on the "Enable" button to enable the application.
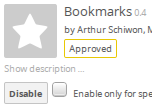
- Once the app is installed the enable button changes to a "Disable" button.
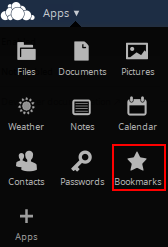
- Logout and login as a regular user. The menu will now show the app item.
- Click on the menu item for the app to execute it.
Disable/Remove an ownCloud Application
An ownCloud application can be removed from users by "Disabling" it. Disabling an application does not remove it from the ownCloud instance.
- To Disable the application the ownCloud administration account will have to be used.
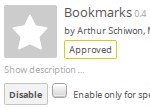
- Navigate to Apps listing then moving down the list of applications until the name "Bookmarks" appears. Clicking on the "Disable" button to disable the application.
- The Bookmarks application is no longer available to users and is disabled. Notice the "Uninstall App" button? Clicking on this will completely remove the application from the ownCloud instance. This feature is available to "some" Approved and should be available to all Experimental applications (provided the developer set it up). "Core" applications cannot be permanently removed in this fashion.
- See the following section for steps on how to manually/permanently remove an application.
Manually Installing/Removing an ownCloud Application
Some ownCloud (i.e. Experimental) applications are not listed in an ownCloud instance. Applications can be downloaded from the ownCloud Applications Store or "GitHub" developer repositories. Before downloading an application check the application repository to ensure that it is compatible with the target ownCloud instance.
Manual Installation
- Applications can be downloaded from:
- - The ownCloud Applications repository: http://apps.owncloud.com (Current versions for specific ownCloud release versions).
- - The "GitHub" Developer repository: https://github.com/owncloud (Current and past versions of the applications are stored in the "Releases" section for each application).
 For example, the "Bookmarks" application code past and present can be found at
 URL: https://github.com/owncloud/bookmarks/releases Notice the name "bookmarks"?

 If another application name is substituted this would navigate to a different
 application past and present code listing.
Please Note:
At times when the ownCloud Community has a new major version release (i.e. 6 to 7) some ownCloud applications may no longer function correctly under the new release. Usually the application author has not updated their software to be compatible with the new ownCloud release. However, it is possible to use an application version from the last "point ownCloud release" (i.e. 6.0.4, 6.0.3, ...) as a substitute until the author or ownCloud developer gets around to updating the application. In this case a download from GitHub will be required.
- Open a "terminal" window on the Amahi server and "su" to the "root" ID ( Linux administrator).
- Download the ownCloud application. Applications downloaded are in a "zip" file format and should be extracted to a target working directory and not the ownCloud "apps" directory.
- After the application has been extracted make sure that the applications main directory name includes only the intended application name. If there is additional information, rename the directory to the application name (make the name is all lower case).
- Copy the application to the ownCloud "apps" directory ("/var/hda/web-apps/owncloud/html/apps").
- "cd" in to the "/var/hda/web-apps/owncloud/html/apps" directory (please see note following regarding some Amahi changes). This is where the ownCloud applications are stored.
- Using the "ls" command a directory to find the application's directory name.
- Set the permissions for the application directory and its dependants:
- Ownership: chown -Rv apache:users <owncloud application directory name>
- Priviledges: chmod -Rv 755 <owncloud application directory name>
- Open a browser session, go to the ownCloud instance, login as the "administration user", and navigate to the Apps listing.
- The owncloud application should appear in the section for uninstalled applications.
- Click on this application name. Details for the application will appear on the right. Click on the "Enable" button to enable the application.
- Navigate back to the "administration users" home and check the list of ownCloud applications available, it should be there.
- Test the application to ensure proper functionality. If it does not work try an another early version of the application (remembering to manually remove the application first).
Manual Removal
Even though an ownCloud application is "Disabled" (administration user only) the application program code remains in a directory. Sometimes it may be necessary to permanently remove the application program code from the ownCloud instance. Additionally there are some ownCloud database entries that have to be removed also.
- Ensure that the application is "Disabled" in the Apps listing.
- Open a "terminal" window on the Amahi server and "su" to the "root" ID ( Linux administrator).
- "cd" in to the "/var/hda/web-apps/owncloud/html/apps" directory (please see note following regarding some Amahi changes). This is where the ownCloud applications are stored.
- Using the "ls" command a directory to find the application's directory name. This is the directory that will be removed.
- Use the "rm -fr <directory name>" command to delete directory and application code.
- Using the "ls" command again will show that directory is gone.
- Close the terminal window.
- All application entries in the ownCloud MariaDB database have to be removed this can done by using Amahi "phpMyAdmin".
- In the database table "oc_appconfig", find all entries having the name of the application in the "appid" column.
- Remove those entries.
- Now the application is permanently removed from ownCloud.
Please Note:
In order to allow multiple instances of different version releases of ownCloud on the same Amahi server naming changes to the main ownCloud application directory and database names have been implemented.
- The location where the actual ownCloud application is stored has changed to "/var/hda/web-apps/owncloudx/html" (where "x" is the major release number). For example for ownCloud release version 6.0.5 the directory is now named "owncloud6".
- The ownCloud database user ID, password, and name have changed in the same manner.
