PBA
The HDA now includes the Personal Backup Appliance, or PBA, with the collaboration of the PBA leader, Roland Hui. Here is what the web interface looks like:

This application is essentially a hard disk clone, backup and restore application.
What to do, in 2 simple steps
- Simply boot your machine from the network. Pressing F12 during BIOS may work after you enable network boot, else see other tips on network booting
- The option to Backup/Restore will appear on the screen:
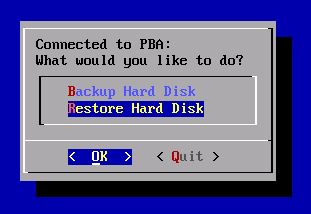
- When Backup is selected, it will ask what disk you want to back up (if you have more than one).
- When Restore is selected, it will ask what image of the list you want to restore, and to what drive.

More
- The PBA app provides a simple user-friendly interface to backup and restore entire hard disk drives over the network. This functionality is similar to that of commercial products such as Norton Ghost Server, but there is no added cost for additional software or hardware. This feature simplifies consumer hard disk backup down to very simple steps.
- The intended audience is any user that wants a no-hassles backup solution. All you need to do is power on the machine you want to backup/restore, boot from the network and select what you want to backup.
- The PBA app backs up the entire hard disk. The MBR, partition table and all partitions are copied. The Personal Backup Appliance aims to be an easy and fast backup solution. Most partitions types such as NTFS, FAT16/32, and ext3 are supported by tools that understand the filesystem, so only the data is copied, and empty space is ignored. This makes copying very fast. For other partition types, raw copies are made. The technology working behind the scenes in PBA is not new. In fact, many of the open source programs and tools used in PBA have been around for a long time. The innovation in PBA is in the presentation and the integration of these programs and tools.
- Thanks to Roland Hui for helping port the personal backup appliance to the HDA!
CHANGE PBA FULL BACKUP PATH
The PBA backups default path is set to /var/hda/apps/pba/backups directory on the operating system drive. To change this after Adding a second hard drive to your HDA, a symbolic link is required.
- Make a sub directory backup to the files directory on the secondary hard drive.
- Change to the /var/hda/apps/pba directory on the operating system drive. Ensure the backups directory does not exist. If it does, remove it.
- As user root, enter ln –sf /var/had/files/backups backups (must match the path set when adding a secondary hard drive.
- Verify ownership of /var/had/pba/backups (symbolic link) is set to apache:apache.
- Ensure settings in /etc/fstab for the secondary drive include uid=48,gid=48 (see note).
- Reboot and attempt a LAN backup. The full backup files should now be saved to the secondary hard drive.
NOTE: This sets ownership of the drive/directories to user apache and group apache. To verify the correct uid and gid, enter id apache. It will display the applicable uid and gid. Permissions must be set as such for the PBA backups to be directed to the secondary hard drive. This is how my secondary drive is configured in /etc/fstab.
Added by diskmounter utility
/dev/sdb1 /var/hda/files vfat rw,user,uid=48,gid=48,fmask=0111,dmask=0000 0 0