User talk:Slimborama
From Amahi Wiki
Revision as of 02:21, 28 February 2011 by Slimborama (talk | contribs)
Fedora 14 Install
tags: fedora 14 partitioning clean install WHS
This page is a visual guide to the Fedora 14 install, without presuming you have existing knowledge of Linux. It also covers how to partition the drive for a clean install and set up for Greyhole, for those of you coming from Windows or WHS. Much of the information is based off the existing partitioning guide for Fedora 12 created by Jayrock.
- Fedora 14 Installation
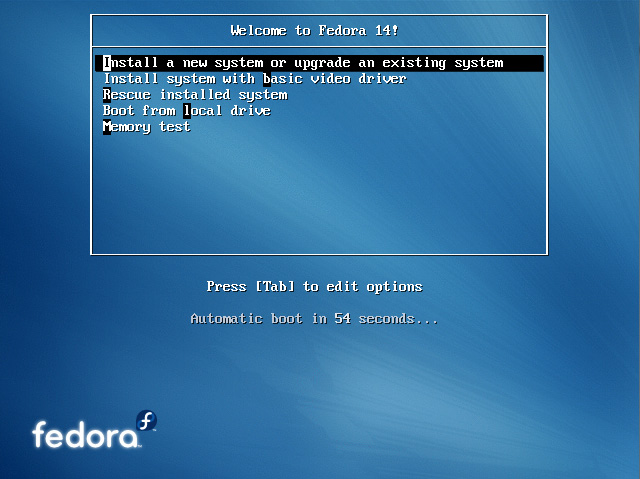
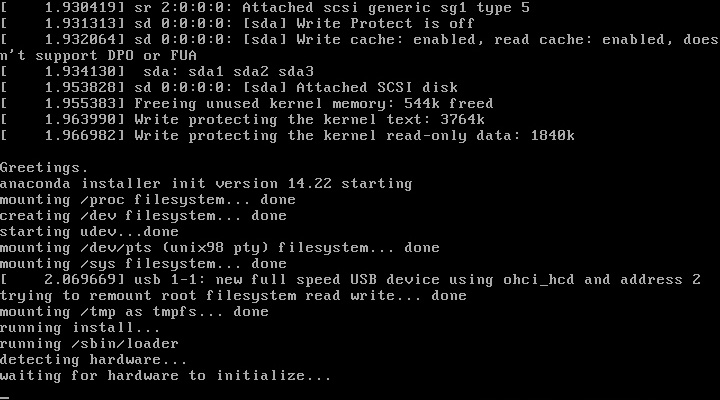
- Insert Fedora 14 DVD
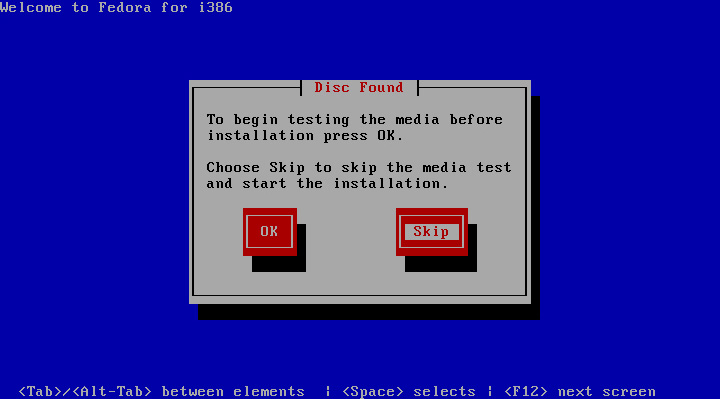
- Click "Skip" to skip the media testing
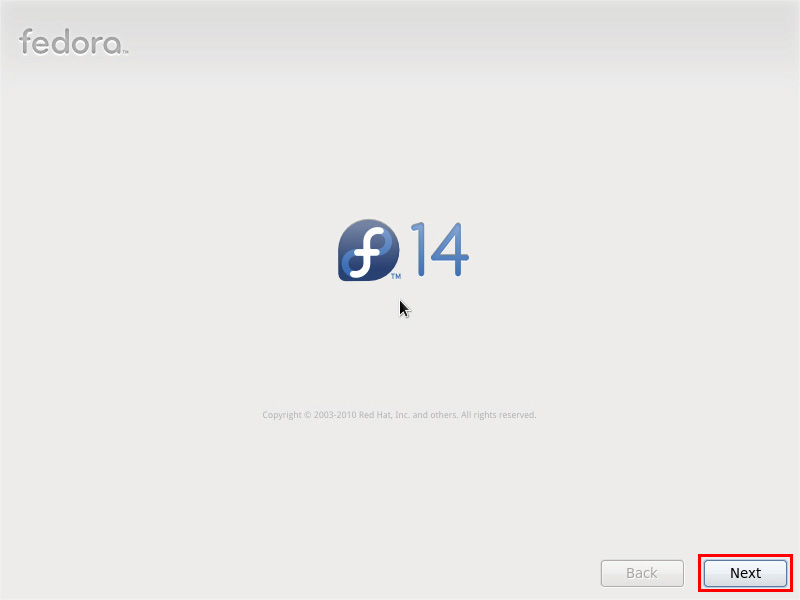
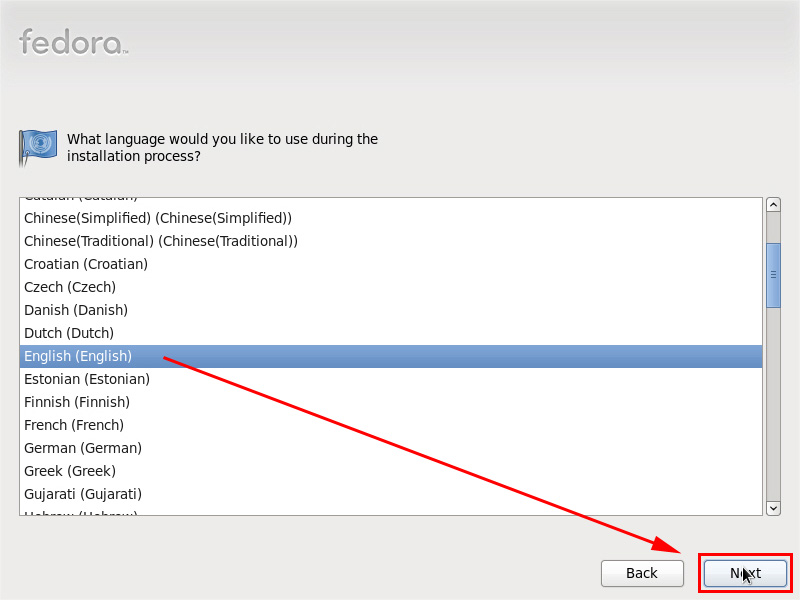
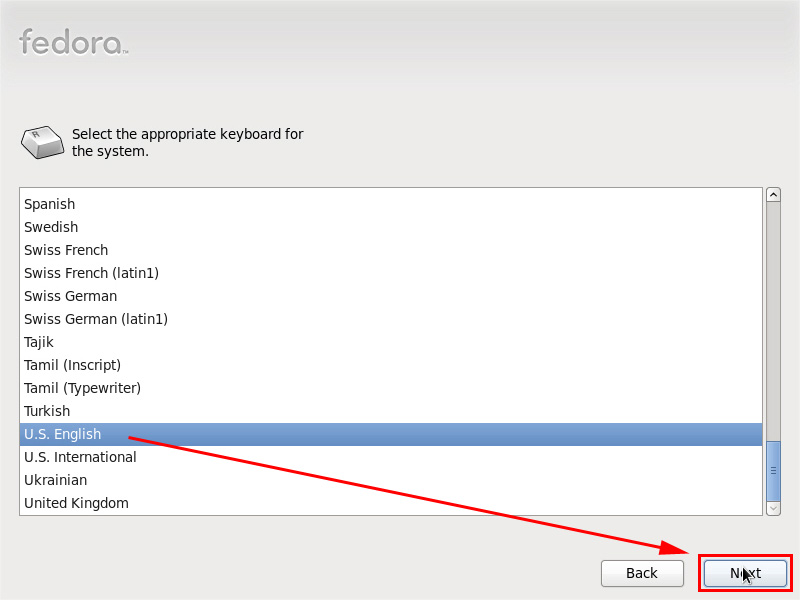
- Choose your languages.
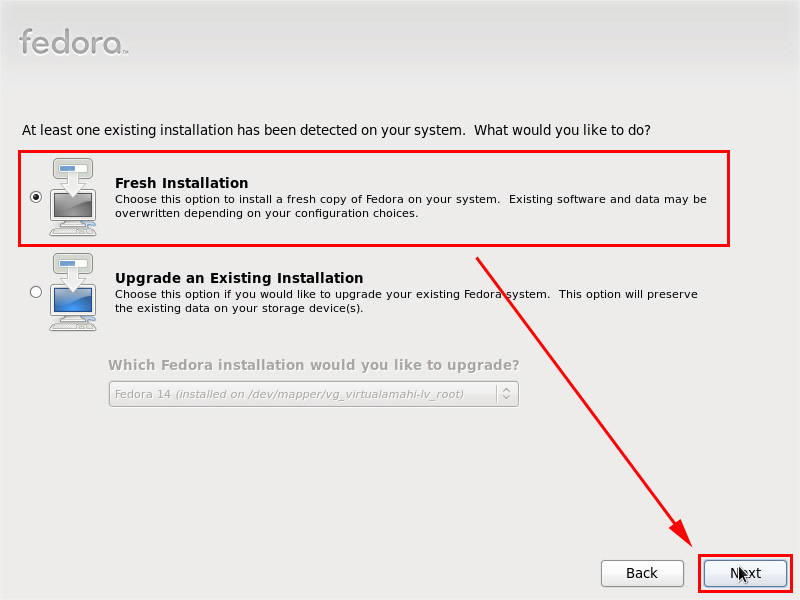
- Optional: Replacing an existing Fedora Installation
- This screen only appears if you have an existing installation
- Fedora 14 Installation Details
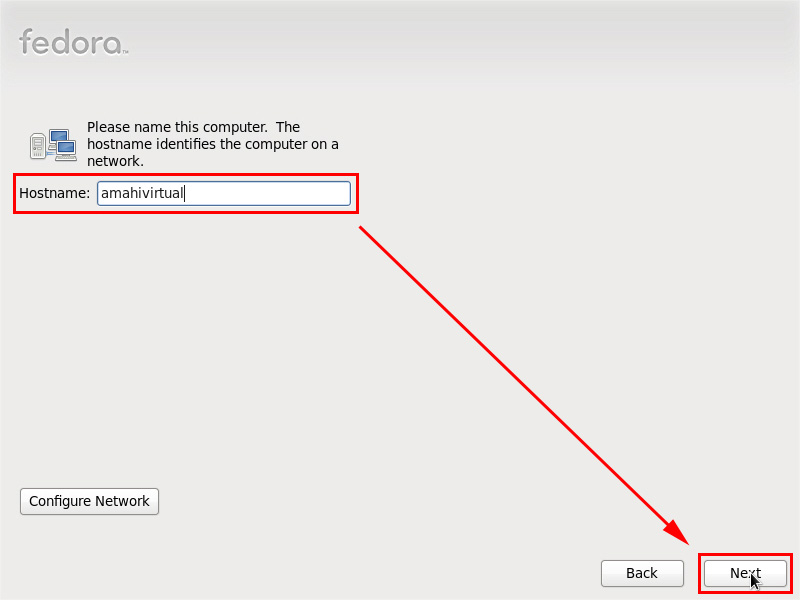
- Choose your computer's name
- Click "Next"
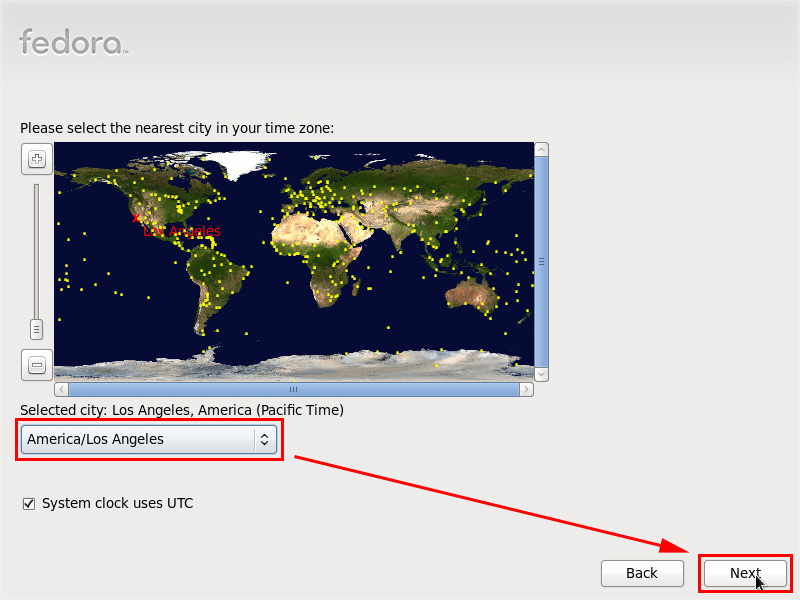
- Choose your time zone
- Click "Next"
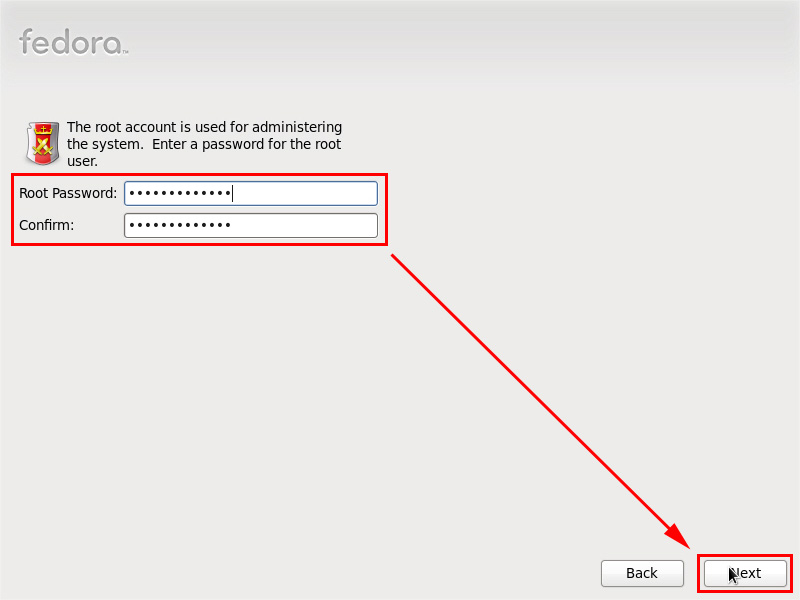
- Fedora 14 Root User
- Enter your system's root password
- This is different than your user password. Linux machines always have a root user that has access to everything on your machine. You want this password to be as strong as possible.
- At this point, you have not created a system user yet. This will come later.
- Click "Next"
- Enter your system's root password
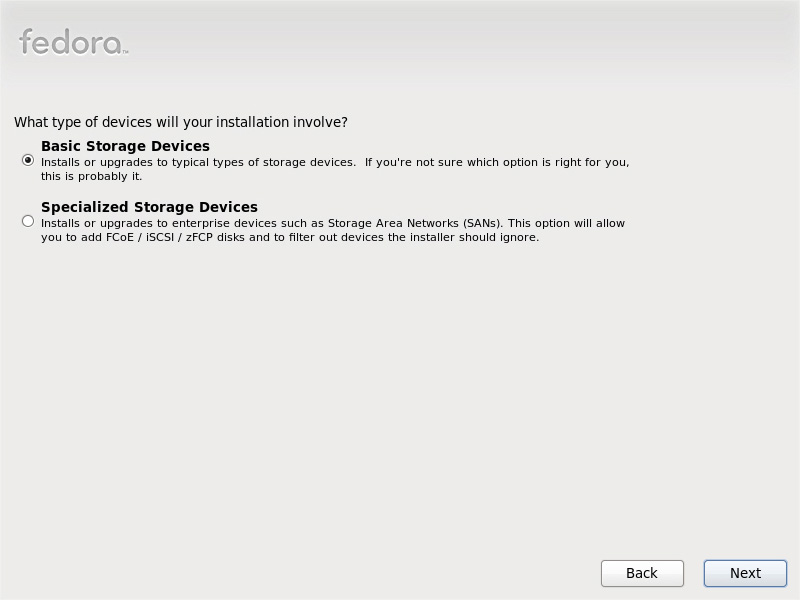
- Basic Storage Devices
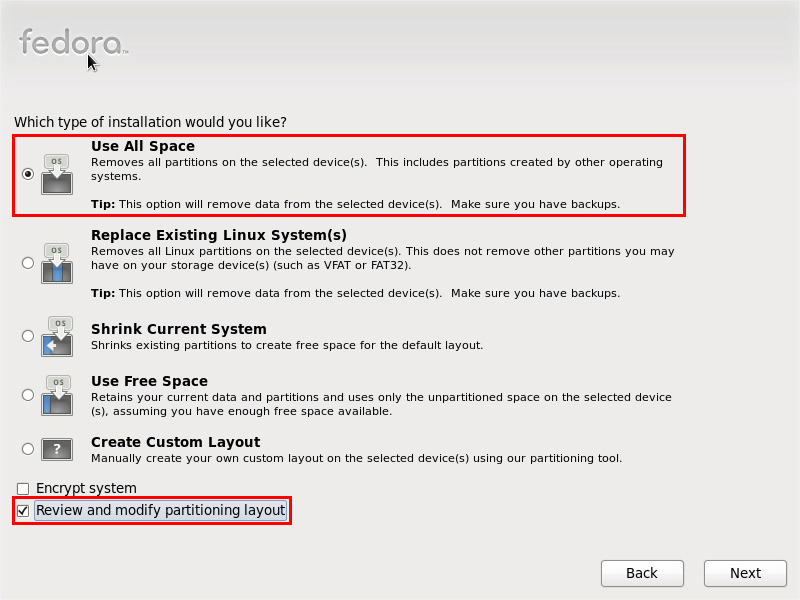
- Choosing an installation type
- For a fresh install, Select "Use All Space"
- Check "Review and modify partitioning layout"
- Editing the partitions
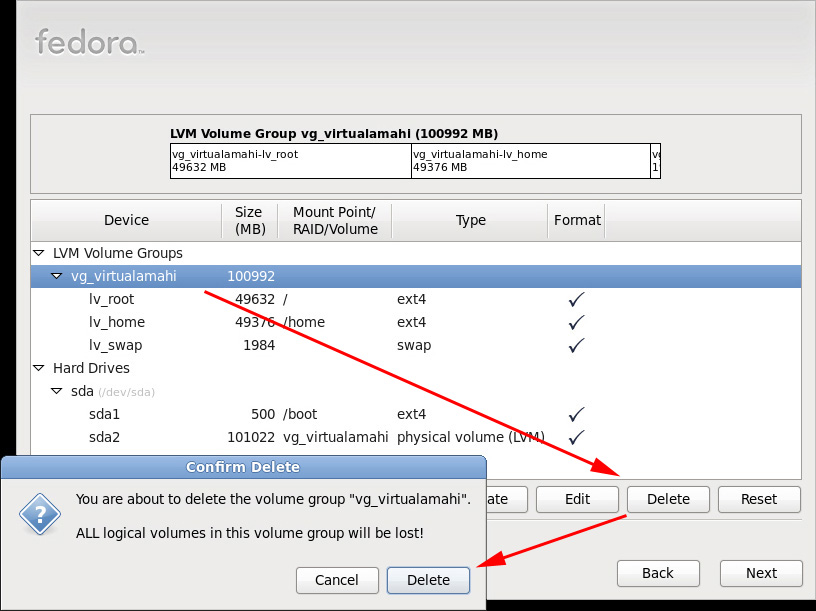
- Delete the default Volume Groups
- Select "LVM Volume Groups" > "vg_<your hostname>"
- Click "Delete"
- Click "Delete" in the "Confirm Delete" popup window
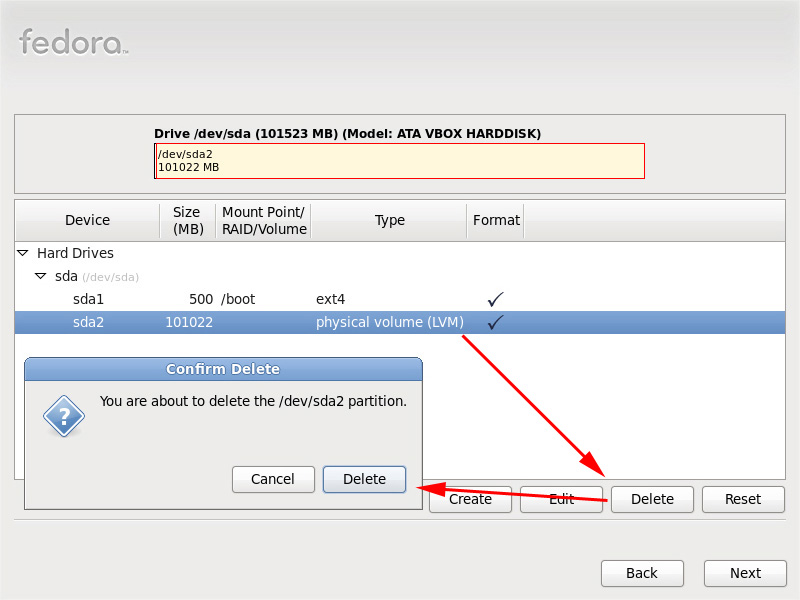
- Delete the "physical volume (LVM)"
- Keep your "/boot" partition at 500 MB. "This is for your own protection so that during a kernel update, you don't run out of disk space then end up with an unbootable system." (rgmhtt on forums)
- Select "Hard Drives" > "sda" > "sda2"
- Click "Delete" in the "Confirm Delete" popup window
- Recreate LVM Physical Volume
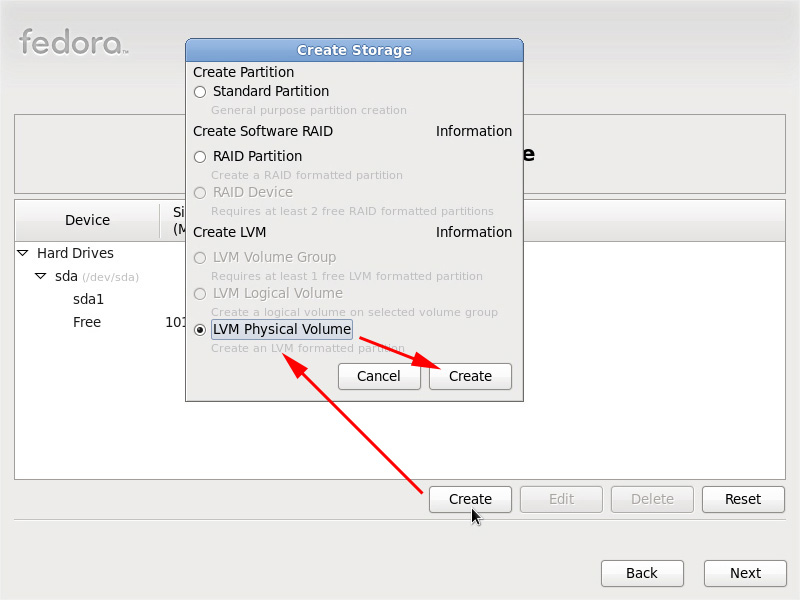
- Click "Create"
- Select "LVM Physical Volume" from the "Create Storage" popup window
- Click "Create" in the "Create Storage" popup window
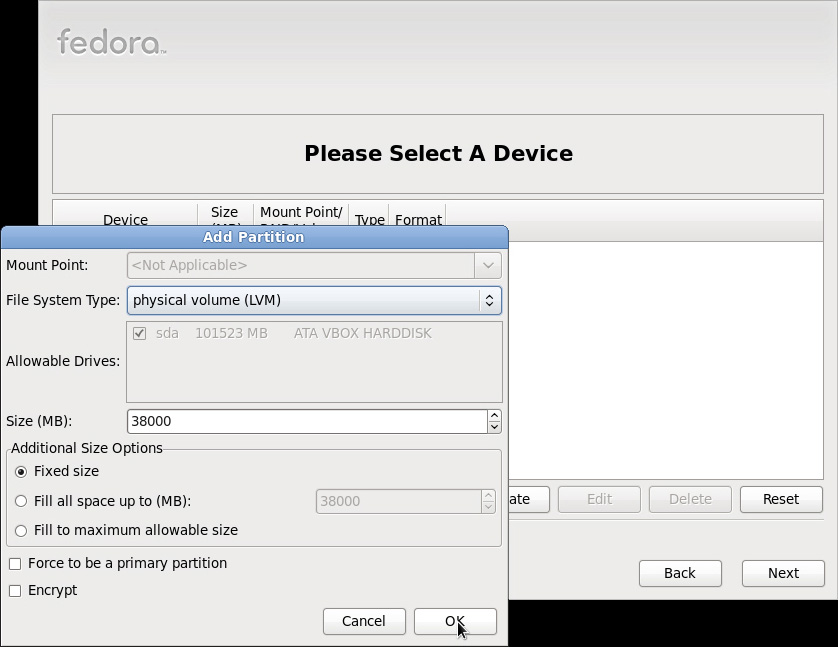
- LVM Physical Volume Partition details in the "Add Partition" window
- File System Type = "physical volume (LVM)"
- Size (MB) = swap size + root "/" + "/home"
- swap size should be 2x your RAM in MB
- 20000 MB is a good size for root "/"
- 10000 MB is a good size for home "/home" but this can be whatever you want
- Click "OK"
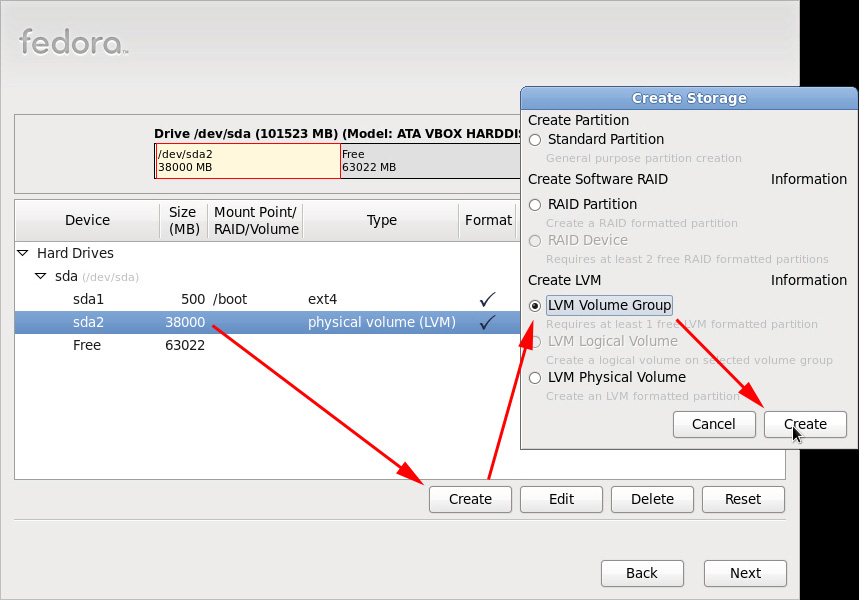
- Recreate LVM Volume Group
- Select "Hard Drives" > "sda" > "sda2"
- Click "Create"
- Select "LVM Volume Group" in the "Create Storage" window
- Click "Create" in the "Create Storage" window
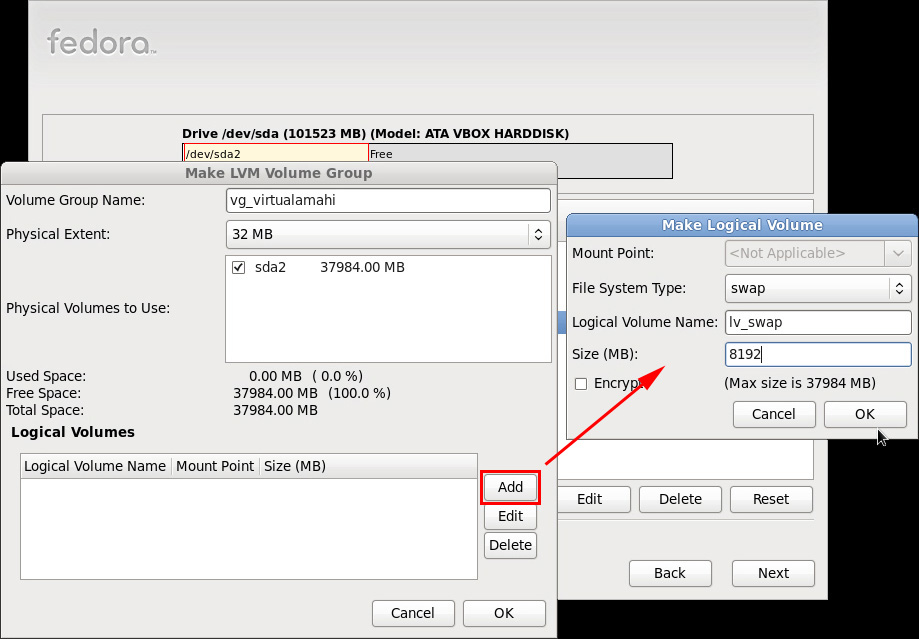
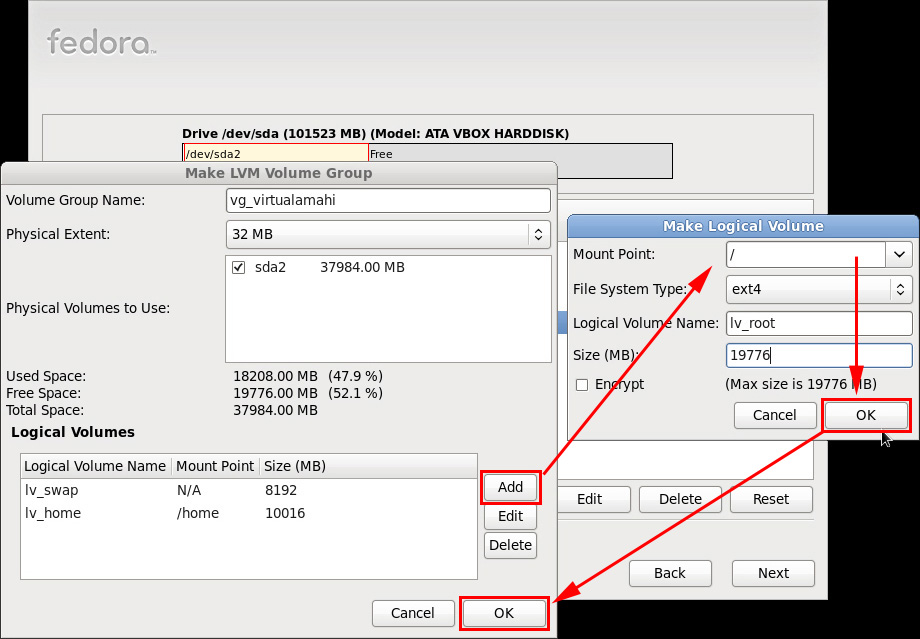
- Make LVM Volume Group > Add Logical Volumes
- Click "Add" from the "Make LVM Volume Group" window
- Volume 1: Create swap volume from the "Make Logical Volume" window
- File System Type = "swap"
- Logical Volume Name = "lv_swap"
- Size (MB) = 2x your RAM in MB
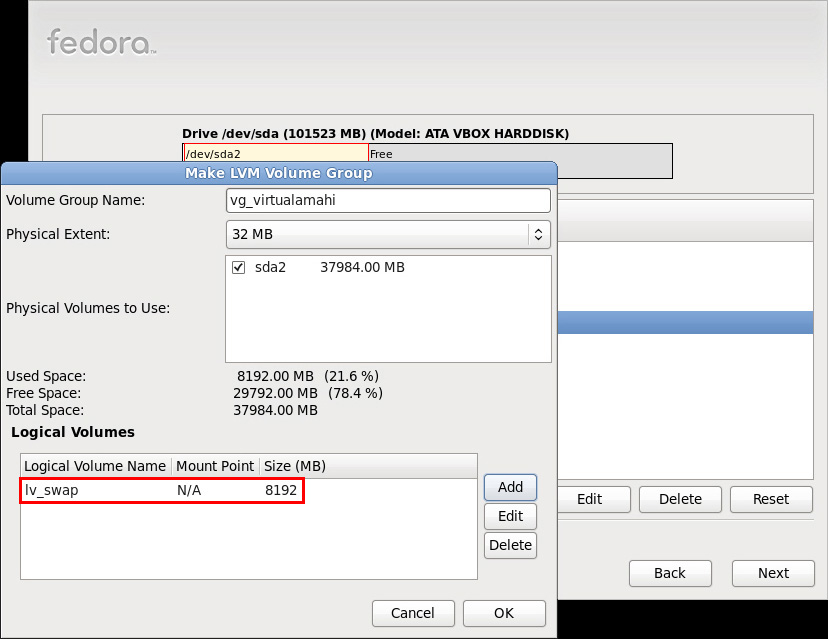
- Click "OK"
- Add Logical Volume
- Click "Add" from the "Make LVM Volume Group" window
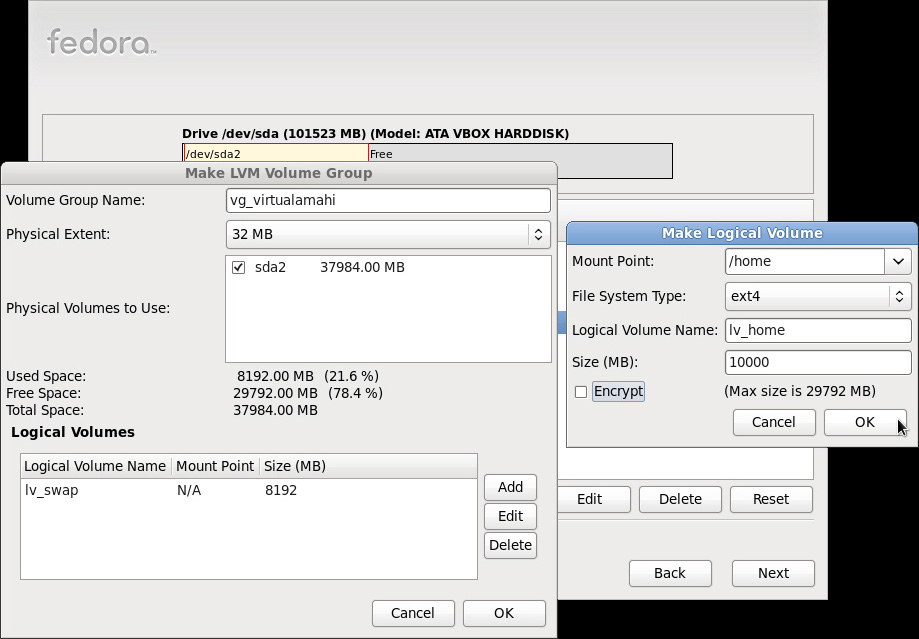
- Volume 2: Create home volume from the "Make Logical Volume" window
- Mount Point = "/home"
- File System Type = "ext4"
- Logical Volume Name = "lv_home"
- Size (MB) = "10000" or whatever you allocated for this
- Click "OK"
- Add Logical Volume
- Click "Add" from the "Make LVM Volume Group" window
- Volume 3: Create root volume from the "Make Logical Volume" window
- Mount Point = "/"
- File System Type = "ext4"
- Logical Volume Name = "lv_root"
- Size (MB) = "20000" or whatever is remaining
- Click "OK"
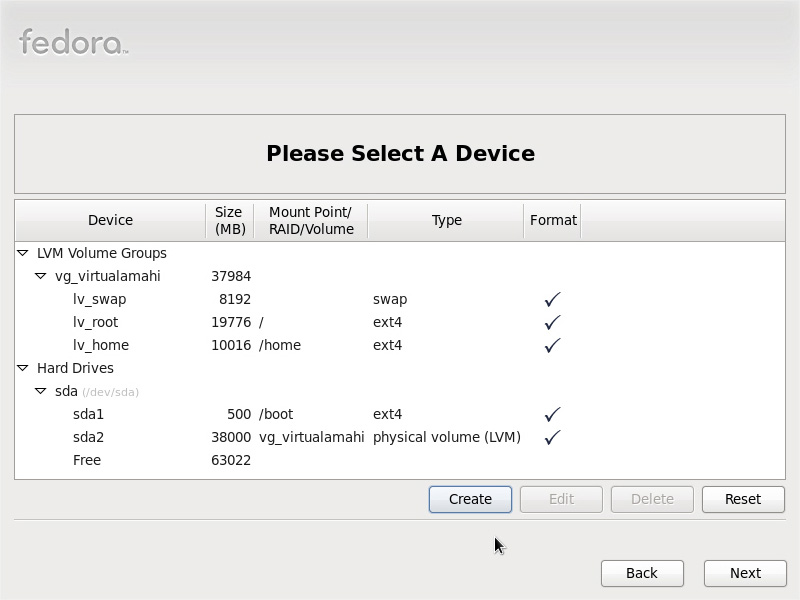
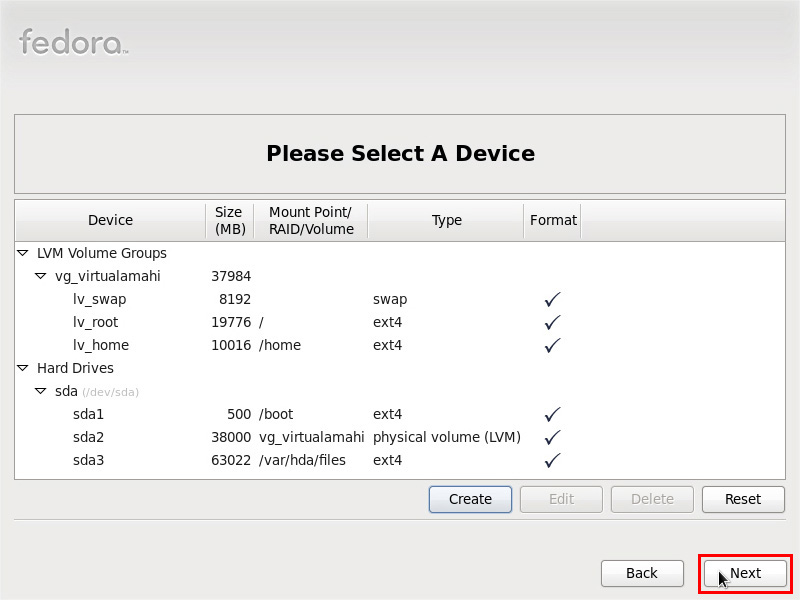
- All done with Logical Volumes!
- Create your Amahi storage volume with remaining free space
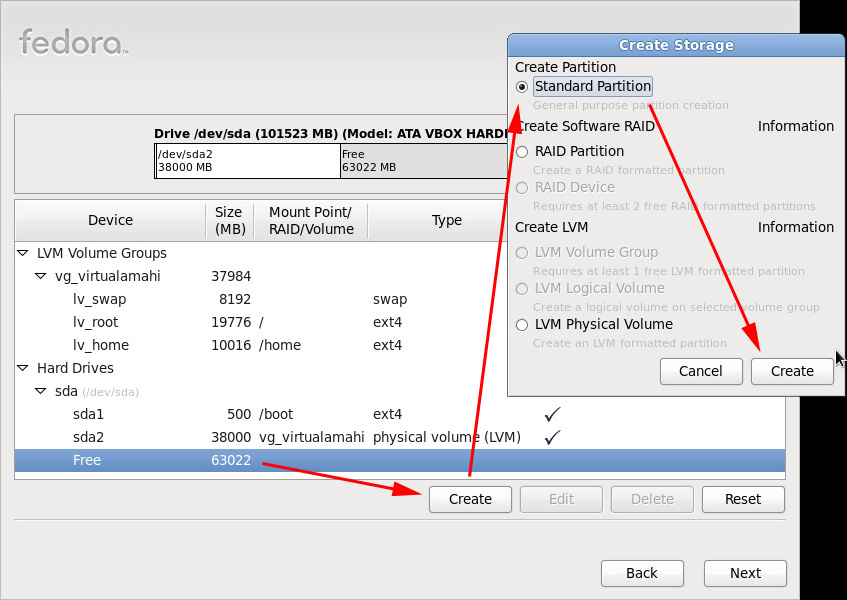
- Select "Hard Drives" > "sda" > "Free"
- Click "Create"
- Select "Standard Partition" from "Create Storage" window
- Click "Create" in the "Create Storage" window
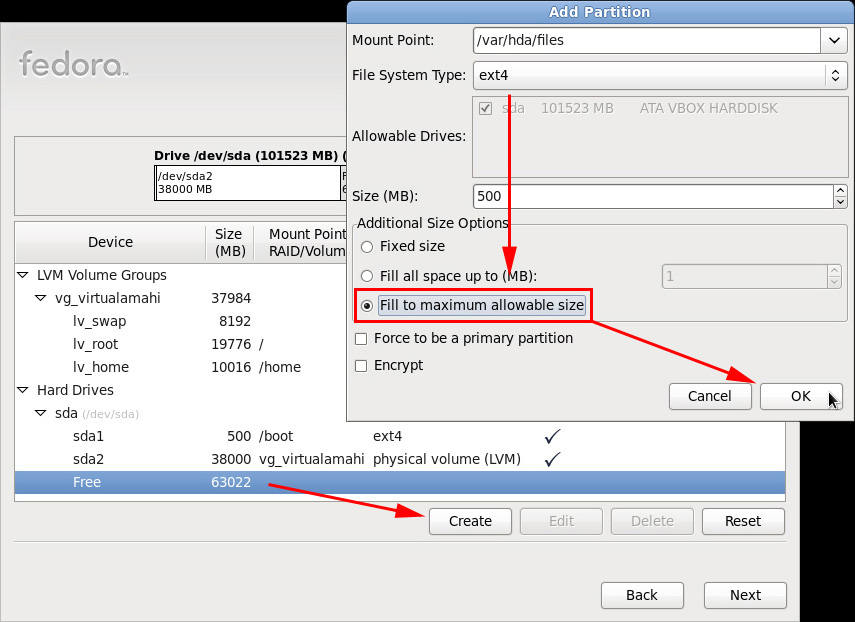
- Storage Volume details
- Mount Point = "/var/hda/files"
- File System Type = "ext4"
- Select "Fill to maximum allowable size"
- Click "OK" in the "Add Partition" window
- All done with Partitioning!
- Click "Next"
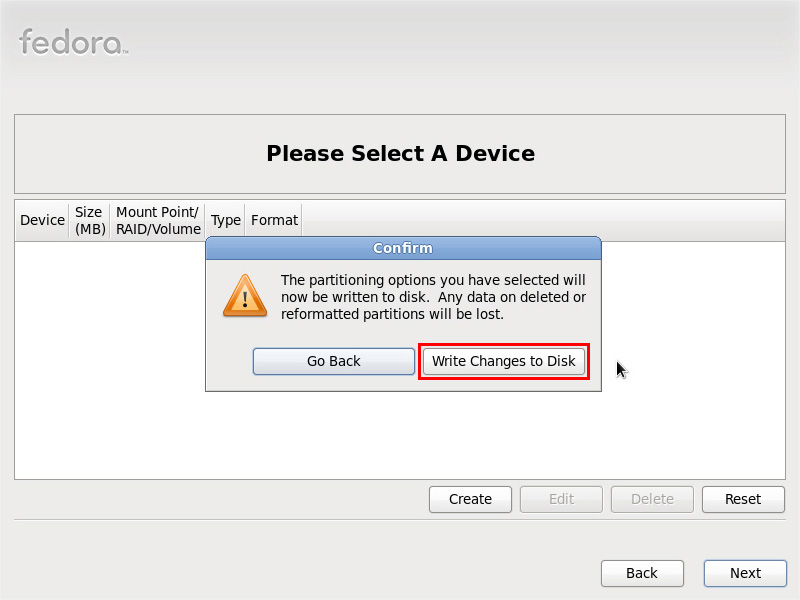
- Confirm Partitioning work in the "Confirm" popup window
- Click "Write Changes to Disk"
- Go Back if you need to
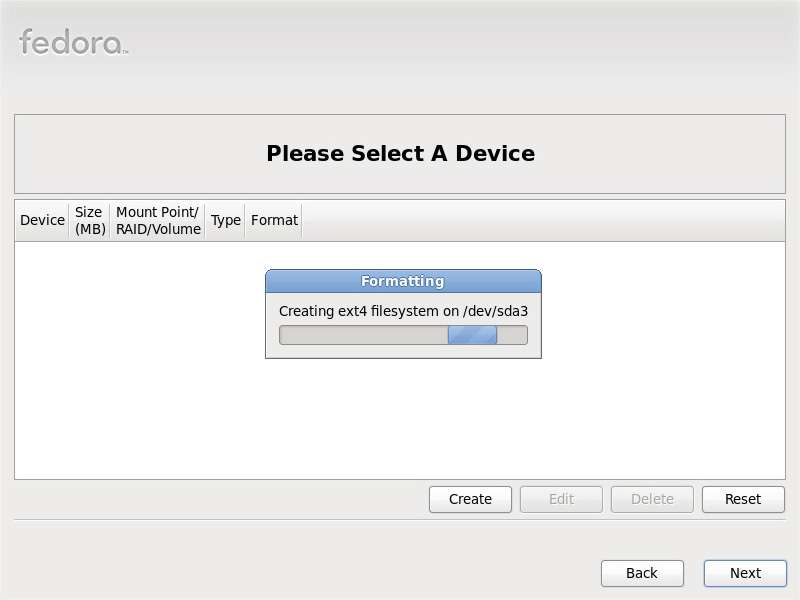
- Install Files
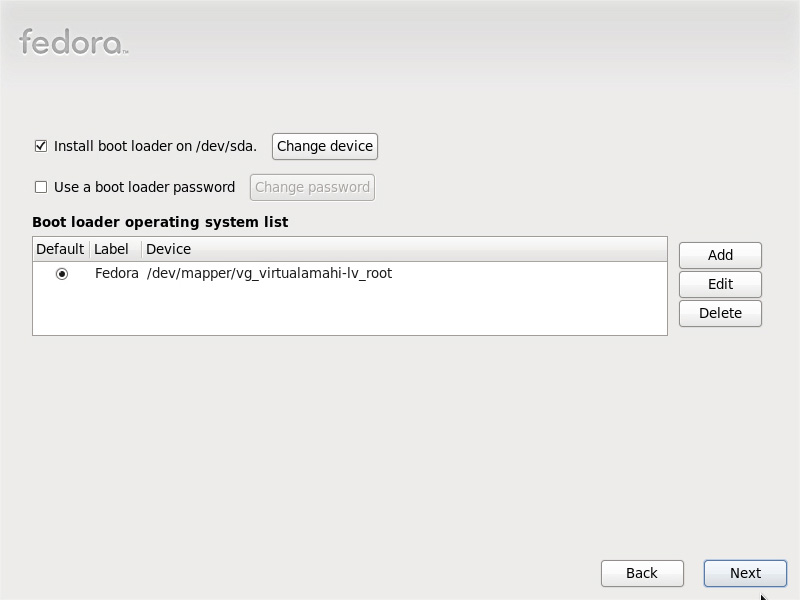
- Shouldn't have to change anything on this screen
- Ensure "Install boot loader on /dev/sda" is checked
- Ensure "Fedora /dev/mapper/vg_<hostname>-lv_root" is selected Default
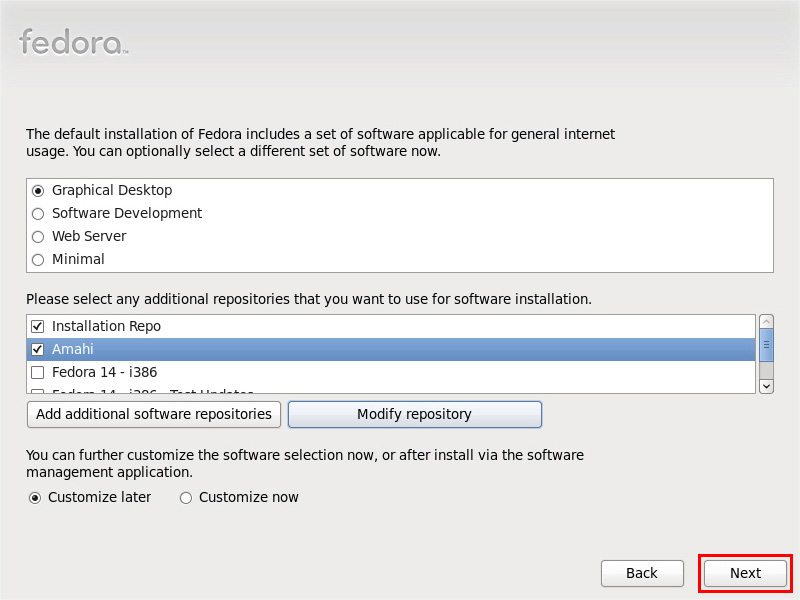
- Click "Next"
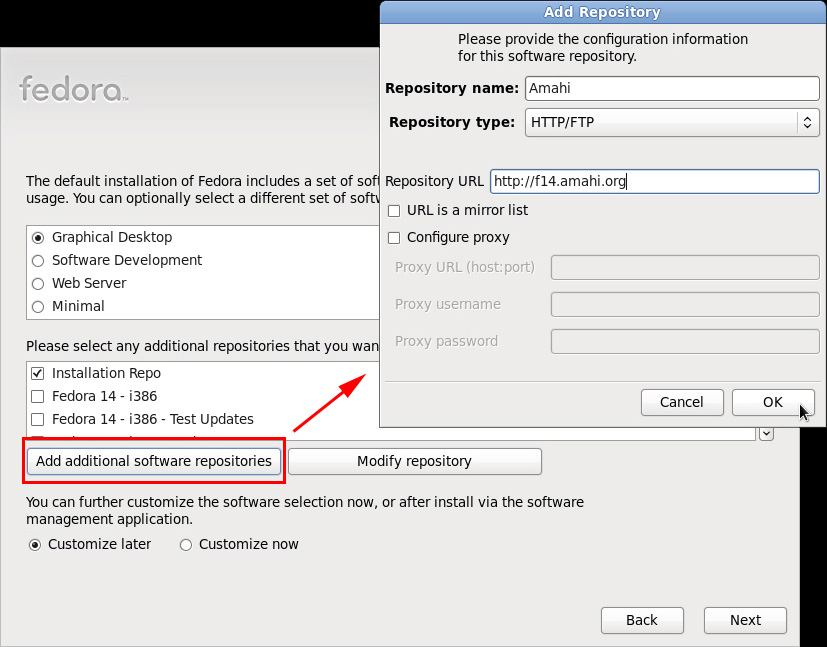
- Add the Amahi repository
- Click "Add additional software repositories"
- Repository name = "Amahi"
- Repository type: HTTP/FTP
- Repository URL = "http://f14.amahi.org"
- Click "OK"
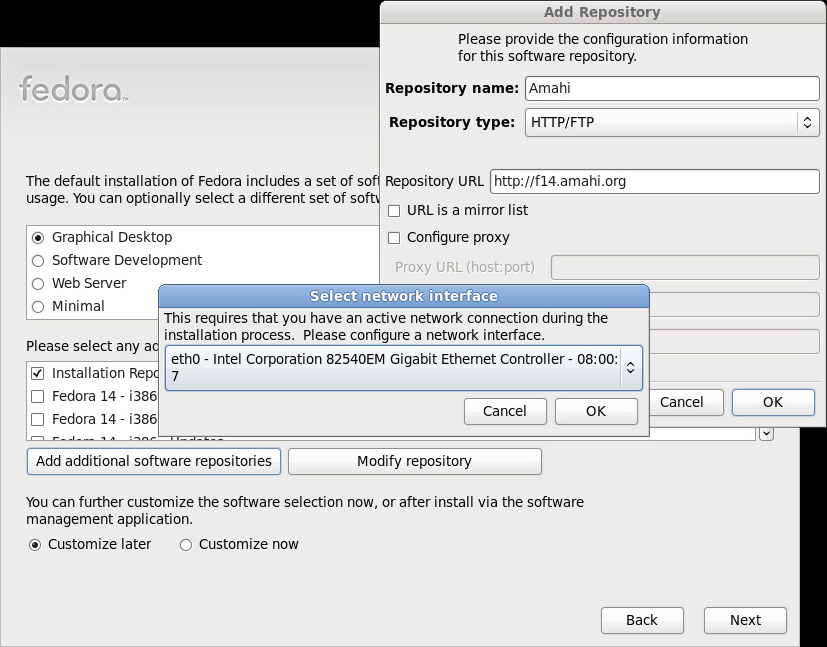
- Click "Add additional software repositories"
- Turn on your network device
- It should list your Network card and MAC address
- Click "OK" in the "Select network interface" window
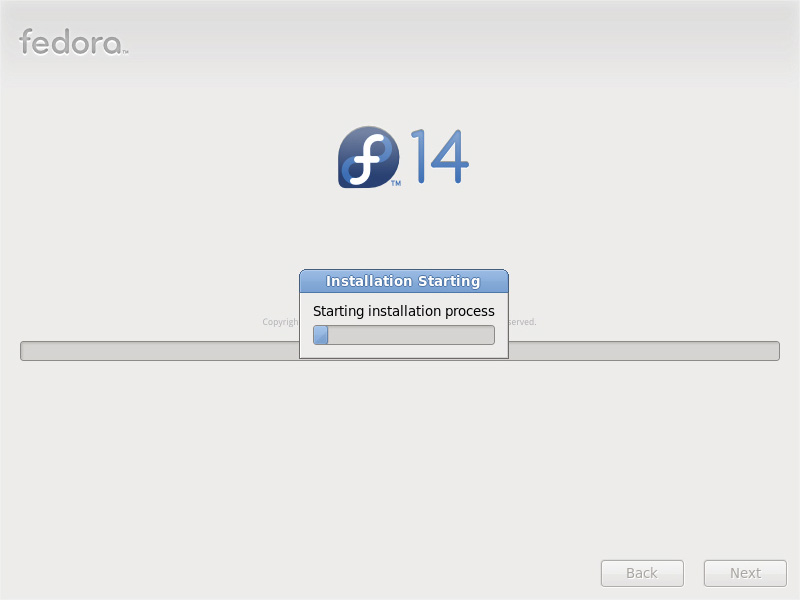
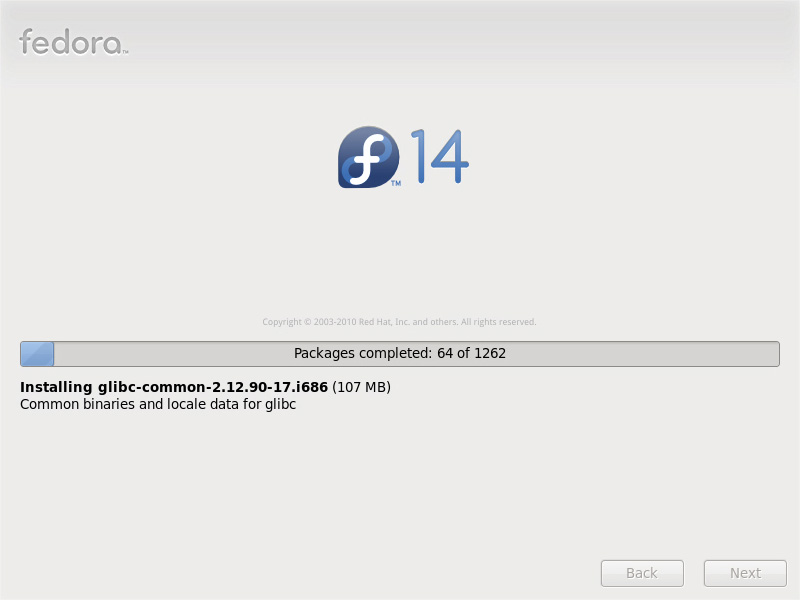
- Fedora installs
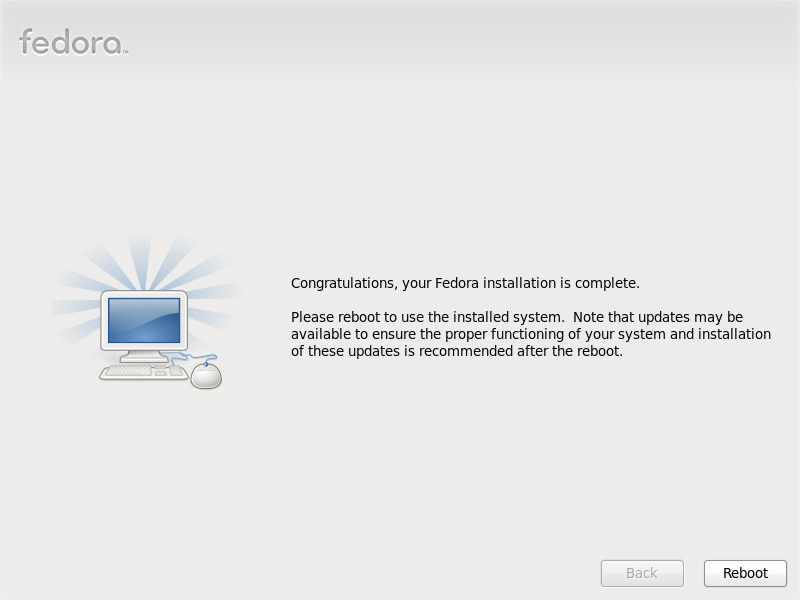
- All Done!
- Click "Reboot"
