Difference between revisions of "Fedora 21 Server Install"
From Amahi Wiki
| Line 1: | Line 1: | ||
| − | + | = Fedora 21 DVD Instructions = | |
This instructions below will guide you through the Fedora 21 Server DVD installation with screen shots and commentary. | This instructions below will guide you through the Fedora 21 Server DVD installation with screen shots and commentary. | ||
| − | + | == Boot Screen == | |
<ul> | <ul> | ||
<li>Select ''Install Fedora-Server 21'' | <li>Select ''Install Fedora-Server 21'' | ||
| Line 9: | Line 9: | ||
</div><br></li> | </div><br></li> | ||
</ul> | </ul> | ||
| − | + | == Language Selection == | |
<ul> | <ul> | ||
<li>Choose desired language and select ''Continue'' | <li>Choose desired language and select ''Continue'' | ||
| Line 16: | Line 16: | ||
</div><br></li> | </div><br></li> | ||
</ul> | </ul> | ||
| − | + | == Installation Summary == | |
<ul> | <ul> | ||
<li>The '''INSTALLATION SUMMARY''' screen will appear. It may take a few minutes to finish ''Checking software dependencies'' | <li>The '''INSTALLATION SUMMARY''' screen will appear. It may take a few minutes to finish ''Checking software dependencies'' | ||
| Line 27: | Line 27: | ||
</div><br></li> | </div><br></li> | ||
</ul> | </ul> | ||
| − | + | == Disk Drive Setup == | |
<ul> | <ul> | ||
<li>Choose the disk drive you want to use for the Fedora installation. If you have more than one disk drive connected, '''DO NOT''' select them at this time. | <li>Choose the disk drive you want to use for the Fedora installation. If you have more than one disk drive connected, '''DO NOT''' select them at this time. | ||
| Line 50: | Line 50: | ||
</div><br></li> | </div><br></li> | ||
</ul> | </ul> | ||
| − | + | == Begin Installation == | |
<ul> | <ul> | ||
<li>Back to the '''INSTALLATION SUMMARY''' and ready to begin installation. Select ''Begin Installation'' | <li>Back to the '''INSTALLATION SUMMARY''' and ready to begin installation. Select ''Begin Installation'' | ||
| Line 57: | Line 57: | ||
</div><br></li> | </div><br></li> | ||
</ul> | </ul> | ||
| − | + | == Create First Admin User == | |
<ul> | <ul> | ||
<li>Installation has begun, but we need to create the First ''Admin'' User and password (This will be your HDA Login). Ensure you select ''Make this user administrator'' check box. Once complete, choose ''Done''. A weak password may require you to select ''Done'' twice. '''DO NOT''' set the root password. | <li>Installation has begun, but we need to create the First ''Admin'' User and password (This will be your HDA Login). Ensure you select ''Make this user administrator'' check box. Once complete, choose ''Done''. A weak password may require you to select ''Done'' twice. '''DO NOT''' set the root password. | ||
| Line 64: | Line 64: | ||
</div><br></li> | </div><br></li> | ||
</ul> | </ul> | ||
| − | + | == Installation Progress == | |
<ul> | <ul> | ||
<li>Now all of the configuration steps are complete. Sit back and watch the progress. | <li>Now all of the configuration steps are complete. Sit back and watch the progress. | ||
| Line 71: | Line 71: | ||
</div><br></li> | </div><br></li> | ||
</ul> | </ul> | ||
| − | + | == Installation Complete == | |
<ul> | <ul> | ||
<li>Installation is complete. Choose ''Reboot'' and remove the installation media. | <li>Installation is complete. Choose ''Reboot'' and remove the installation media. | ||
Revision as of 22:57, 17 January 2016
Contents
Fedora 21 DVD Instructions
This instructions below will guide you through the Fedora 21 Server DVD installation with screen shots and commentary.
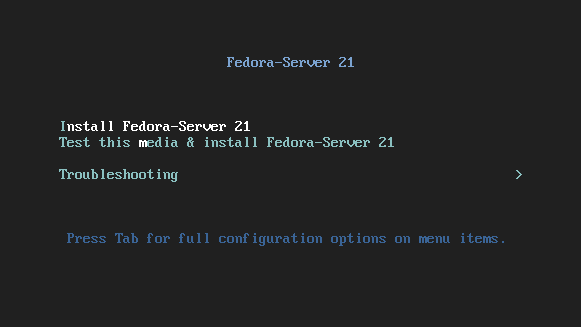
Boot Screen
- Select Install Fedora-Server 21

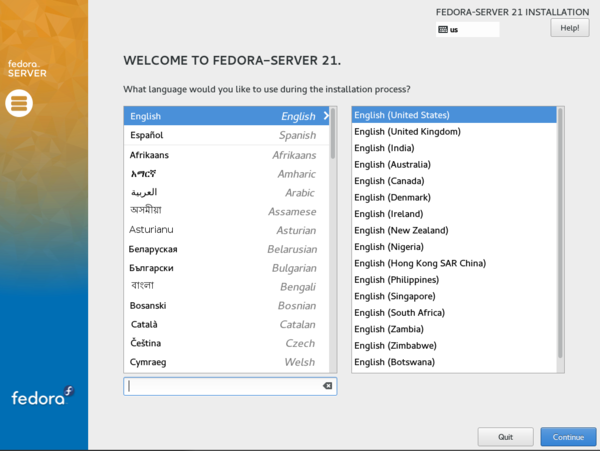
Language Selection
- Choose desired language and select Continue

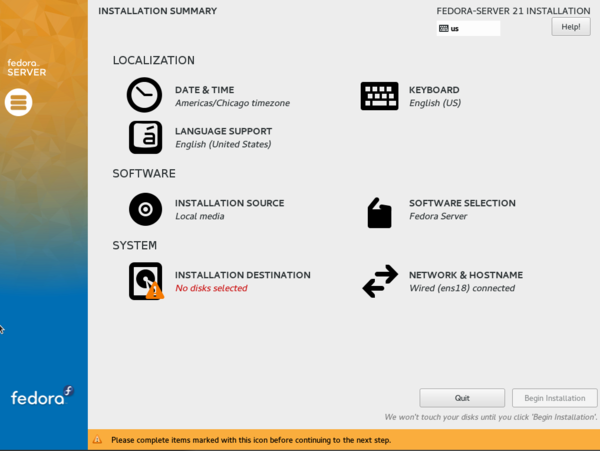
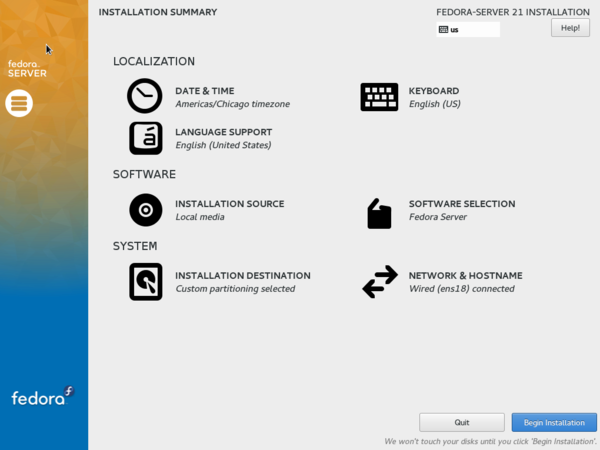
Installation Summary
- The INSTALLATION SUMMARY screen will appear. It may take a few minutes to finish Checking software dependencies
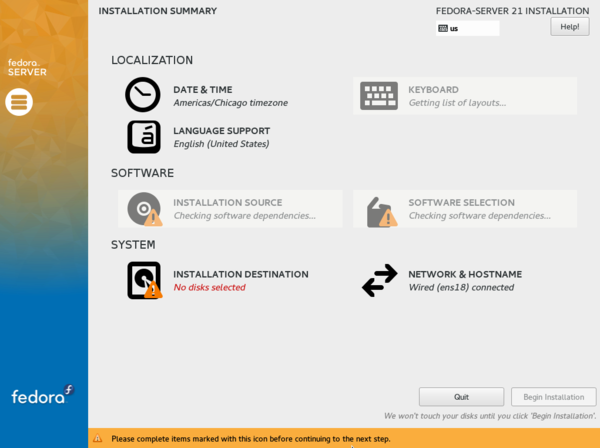
- Once complete, next choose INSTALLATION DESTINATION. This is where you will select the disk drive to use.


Disk Drive Setup
- Choose the disk drive you want to use for the Fedora installation. If you have more than one disk drive connected, DO NOT select them at this time.
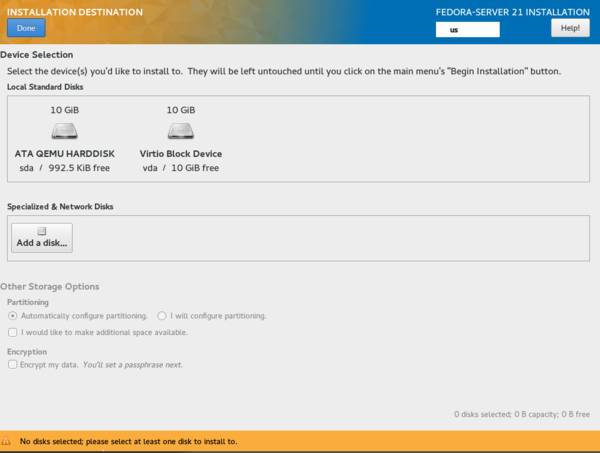
- You will notice a check mark on the disk drive selected. Select I will configure partitioning and then choose Done.

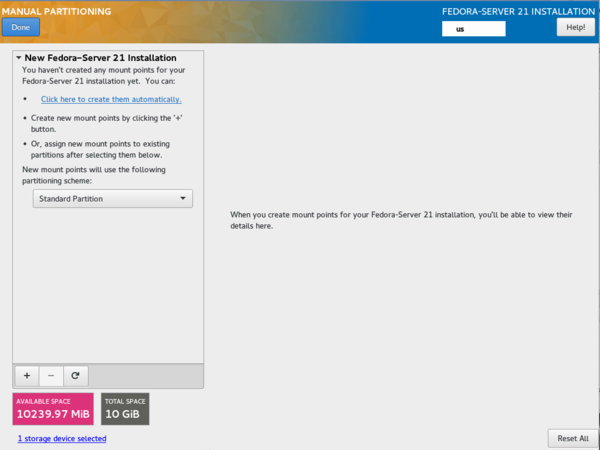
- Ensure the New mount points will use the following partitioning scheme: is changed to reflect Standard partition. Refer to remove existing disk partitions guidance if you are not using an empty disk drive. Then select Click here to create them automatically.
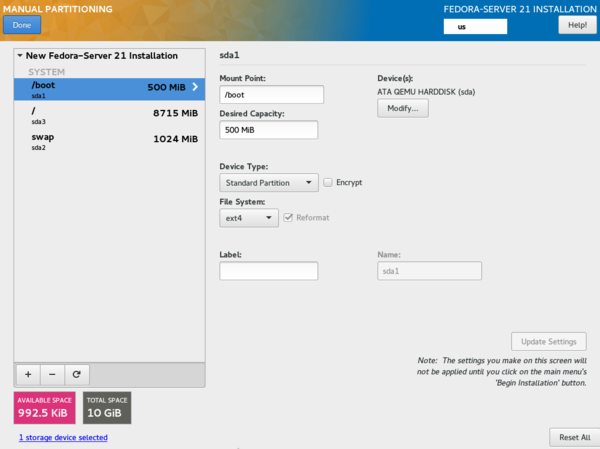
- The disk drive partition should look similar to this setup. For most users, then default partitioning scheme used will suffice. However, you can manually change it using the hard drive partition scheme documentation as a guide. Once complete, choose Done
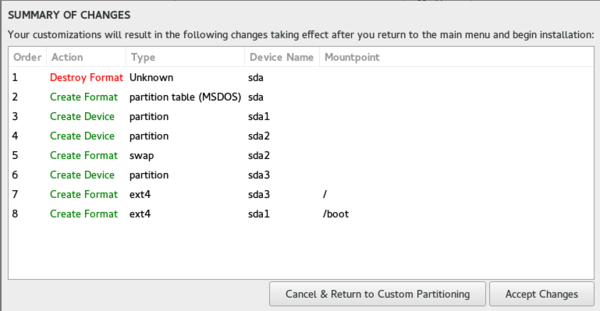
- You will now see SUMMARY OF CHANGES to the disk drive. Choose Accept Changes


Begin Installation
- Back to the INSTALLATION SUMMARY and ready to begin installation. Select Begin Installation

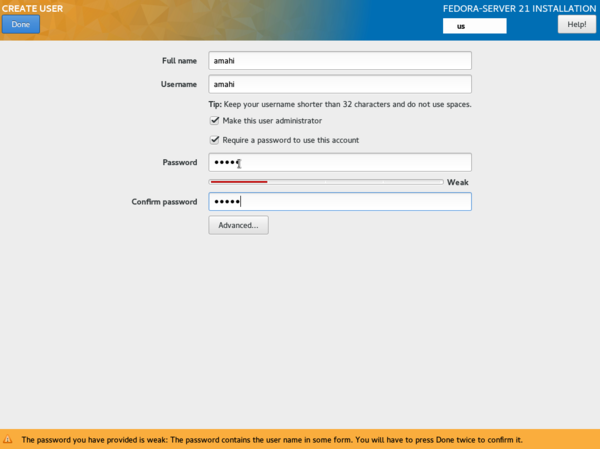
Create First Admin User
- Installation has begun, but we need to create the First Admin User and password (This will be your HDA Login). Ensure you select Make this user administrator check box. Once complete, choose Done. A weak password may require you to select Done twice. DO NOT set the root password.

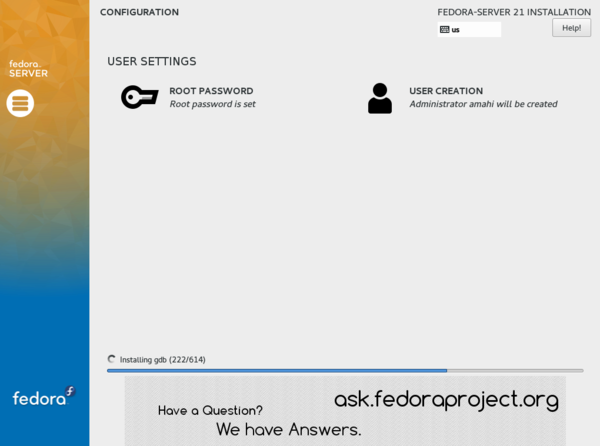
Installation Progress
- Now all of the configuration steps are complete. Sit back and watch the progress.

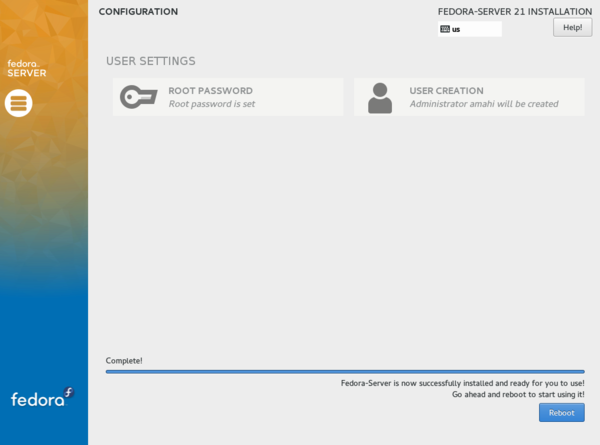
Installation Complete
- Installation is complete. Choose Reboot and remove the installation media.

Now proceed to the Amahi 8 Install section.